1. Any Raspberry Pi microcomputer
2. Raspbian Lite image
3. SD / microSD card (At least 4GB or higher, but it is possible to use smaller storage space depending on your configuration)
4. Keyboard and Mouse (For using the GUI, but can vary depending on how the Raspberry Pi will be used)
5. TV / Monitor (For seeing the GUI)
6. A normal computer with Linux, macOS, or Windows (For burning Rasbian Lite image to SD / microSD)
7. Internet connectionTable of Contents
1. Introduction
2. Memory Usage
3. Part 1 – Build the Foundation
4. Part 2 – Bring in the Furniture
5. Sample Screenshots
6. GUI Customization
7. Virtual Machine Playground
8. Advanced – Custom Desktop Environment using i3 WM
9. ExtrasIntroduction
There are two official Linux distributions for the Raspberry Pi which are Raspbian and Raspbian Lite. Rasbian is a full Linux distribution for the Raspberry Pi and comes with a new desktop environment called PIXEL (Pi Improved Xwindows Environment Lightweight). The desktop environment is the GUI (Graphical User Interface) of the operating system. Raspbian includes preinstalled applications for word processing, games, programming, and so on. This is great for beginners and people who just want to start using their Raspberry Pi immediately.
But, some of us don’t like that. We want the ability to work with a GUI, but with our own preferences. In other words, we want to start with a clean install, and then install whatever packages we need on top. Packages can consist of desktop environments, drivers, compilers, applications, utilities, and so on.
As a reward, there would be more storage space, less usage on memory, and GUI customization! This is where Raspbian Lite comes into play.
Raspbian Lite is similar to that of a core. A core basically contains all the essential packages needed to make the hardware on the Raspberry Pi work correctly. Raspbian Lite was made so that the Pi can run as a headless system where the Pi is controlled by commands sent from an external source. Raspbian Lite does not contain a GUI but has a command line interface (CLI) which is shown automatically if it is connected to an external display. Configuration of Raspbian Lite can also be done via SSH (Secure Shell) from a computer connected to the same network as the Raspberry Pi. More information on SSH in the official Raspberry Pi documentation.
If you have ever heard of Arch Linux, Raspbian Lite is similar to that. Since Raspbian Lite is supported by the Raspberry Pi Foundation, it is the preferred operating system for most Raspberry Pi microcomputers.
To summarize, this guide talks about how to run Raspbian Lite with a GUI, in this case you choose your desktop environment, PIXEL, LXDE, XFCE, or MATE. There is an advanced section in this guide that talks about how to create your own desktop environment if you are interested. The official Rasbian distribution uses PIXEL as its default desktop environment, but reality, it is actually a fork (or a branch) of LXDE. Other distributions such as Xubuntu uses XFCE as its default desktop environment, and Ubuntu MATE uses MATE as its default desktop environment. If you are not familiar with Linux desktop environments, be sure to watch videos or research on the types of GUIs available. That way, you will have and idea of what GUI to install, if any.
For those that are really consciousness about memory usage, a desktop environment based on LXDE would be a recommended choice. For those that prefer a prettier or modern look, then XFCE or MATE would be a recommended choice. However, both do the exact same job which is to make your Raspberry Pi a simple desktop computer that is easy to use. This is assuming that you want to use a prebuilt desktop environment. Otherwise you are free to create your own desktop environment.
So why do this? Well, you decide how your desktop looks like, you decide what applications to install, and finally, you decide what do to next!
Let’s begin!
Memory Usage
Before beginning to install Raspbian Lite with a GUI, let’s explore memory usage. In a nutshell, the less memory your Raspberry Pi consumes, the more applications it can run. Raspbian Lite itself consumes very little memory since it is a core. As discussed earlier, a core only has the essential packages that make the hardware on the Raspberry Pi work.
NOTE: The memory used shown in the screenshots may be different than what your installation may actually use. Use this information as a reference to determine what desktop environment is right for you.
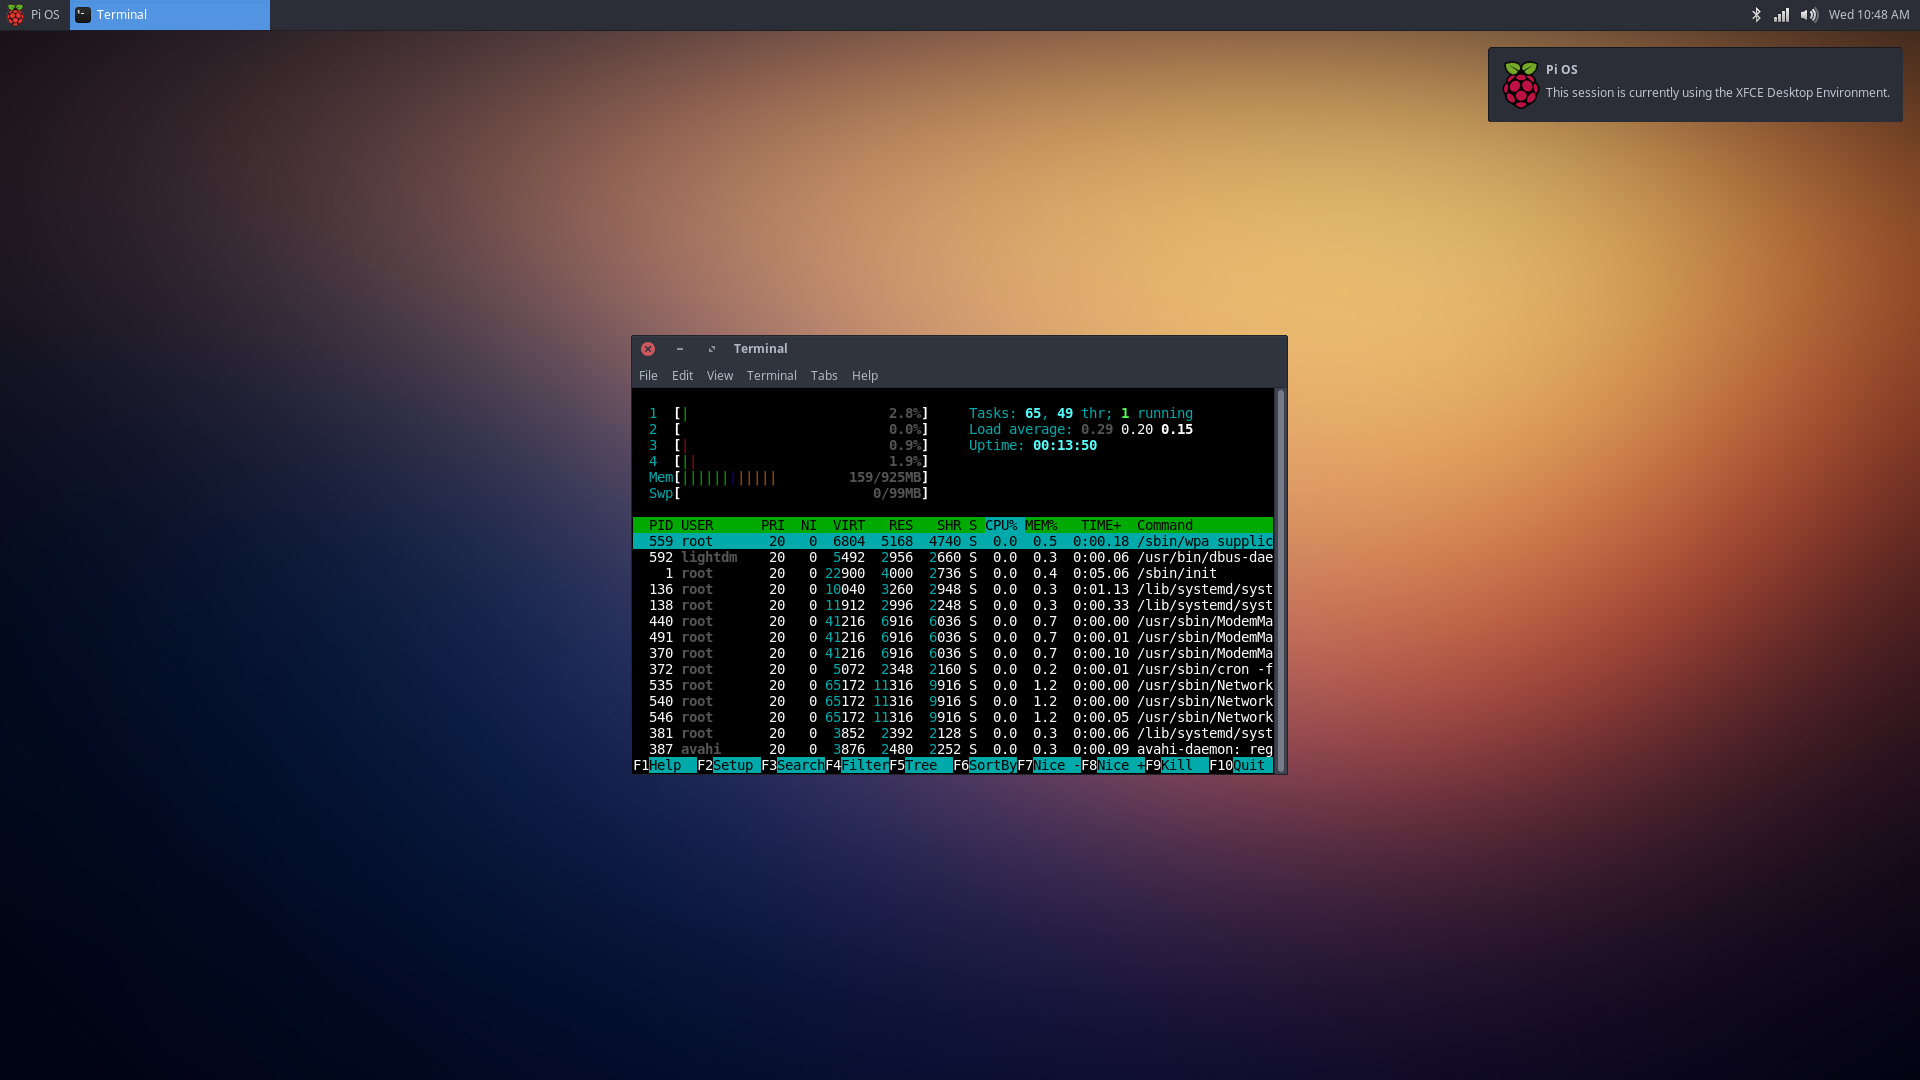
So how much memory does Raspbian Lite itself use?
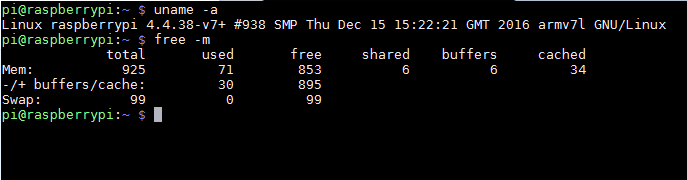
*Right Click > Open Image in New Tab to see full size image.
If we take a look at the screenshot, the memory is displayed in megabytes. This Raspberry Pi has 925MB of total memory. Some of the memory is internally allocated to the GPU by default. This means that the operating system and applications can use up to 925MB of memory.
Currently, Raspbian Lite is using 30MB of memory. Very impressive. This means that the available memory to use is now 895MB.
How does this compare to Raspbian with PIXEL?
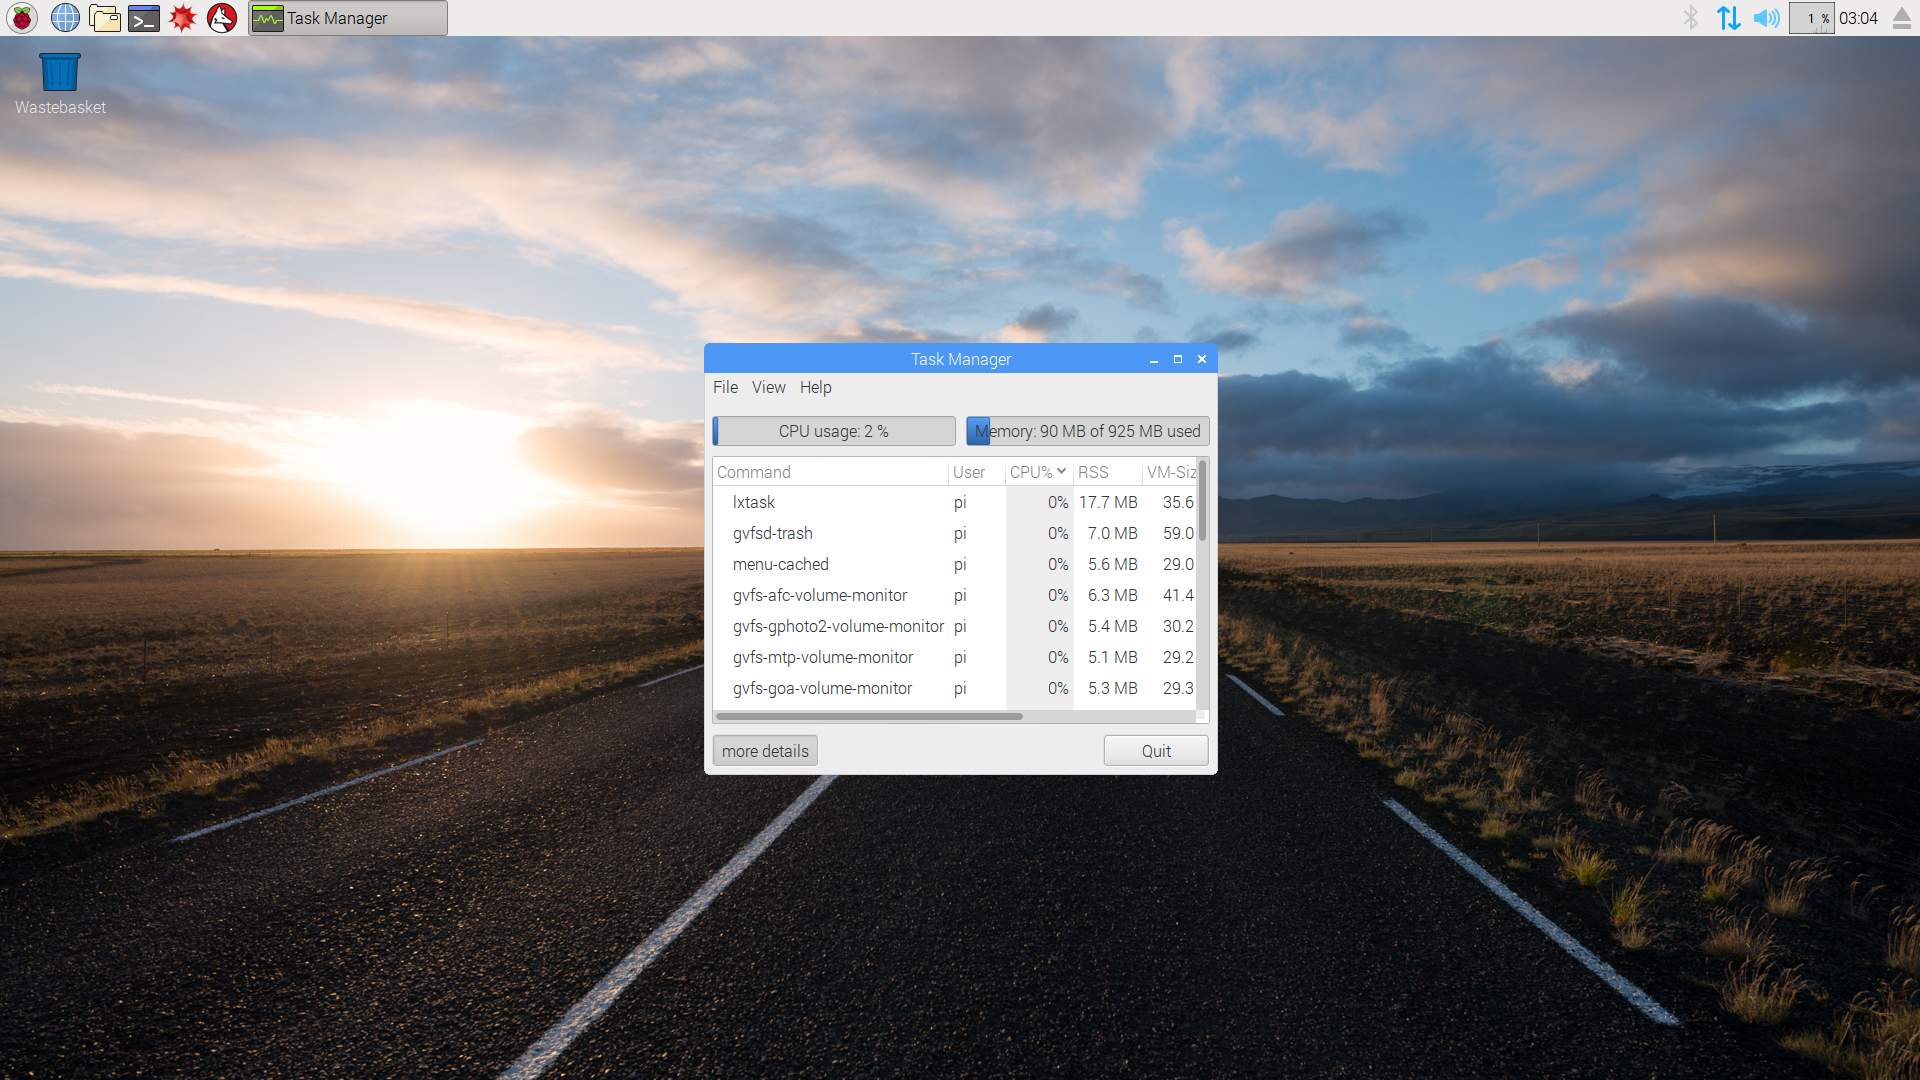
*Right Click > Open Image in New Tab to see full size image.
On a clean installation, Raspbian with PIXEL is using about 90MB of memory. That’s pretty good. Now, let’s see what the memory usage is with Raspbian Lite running various GUIs.
If Raspbian Lite is running PIXEL Desktop Environment:

*Right Click > Open Image in New Tab to see full size image.
Here we see that Raspbian Lite with PIXEL is using about 76MB of Memory.
If Raspbian Lite is running LXDE Desktop Environment:
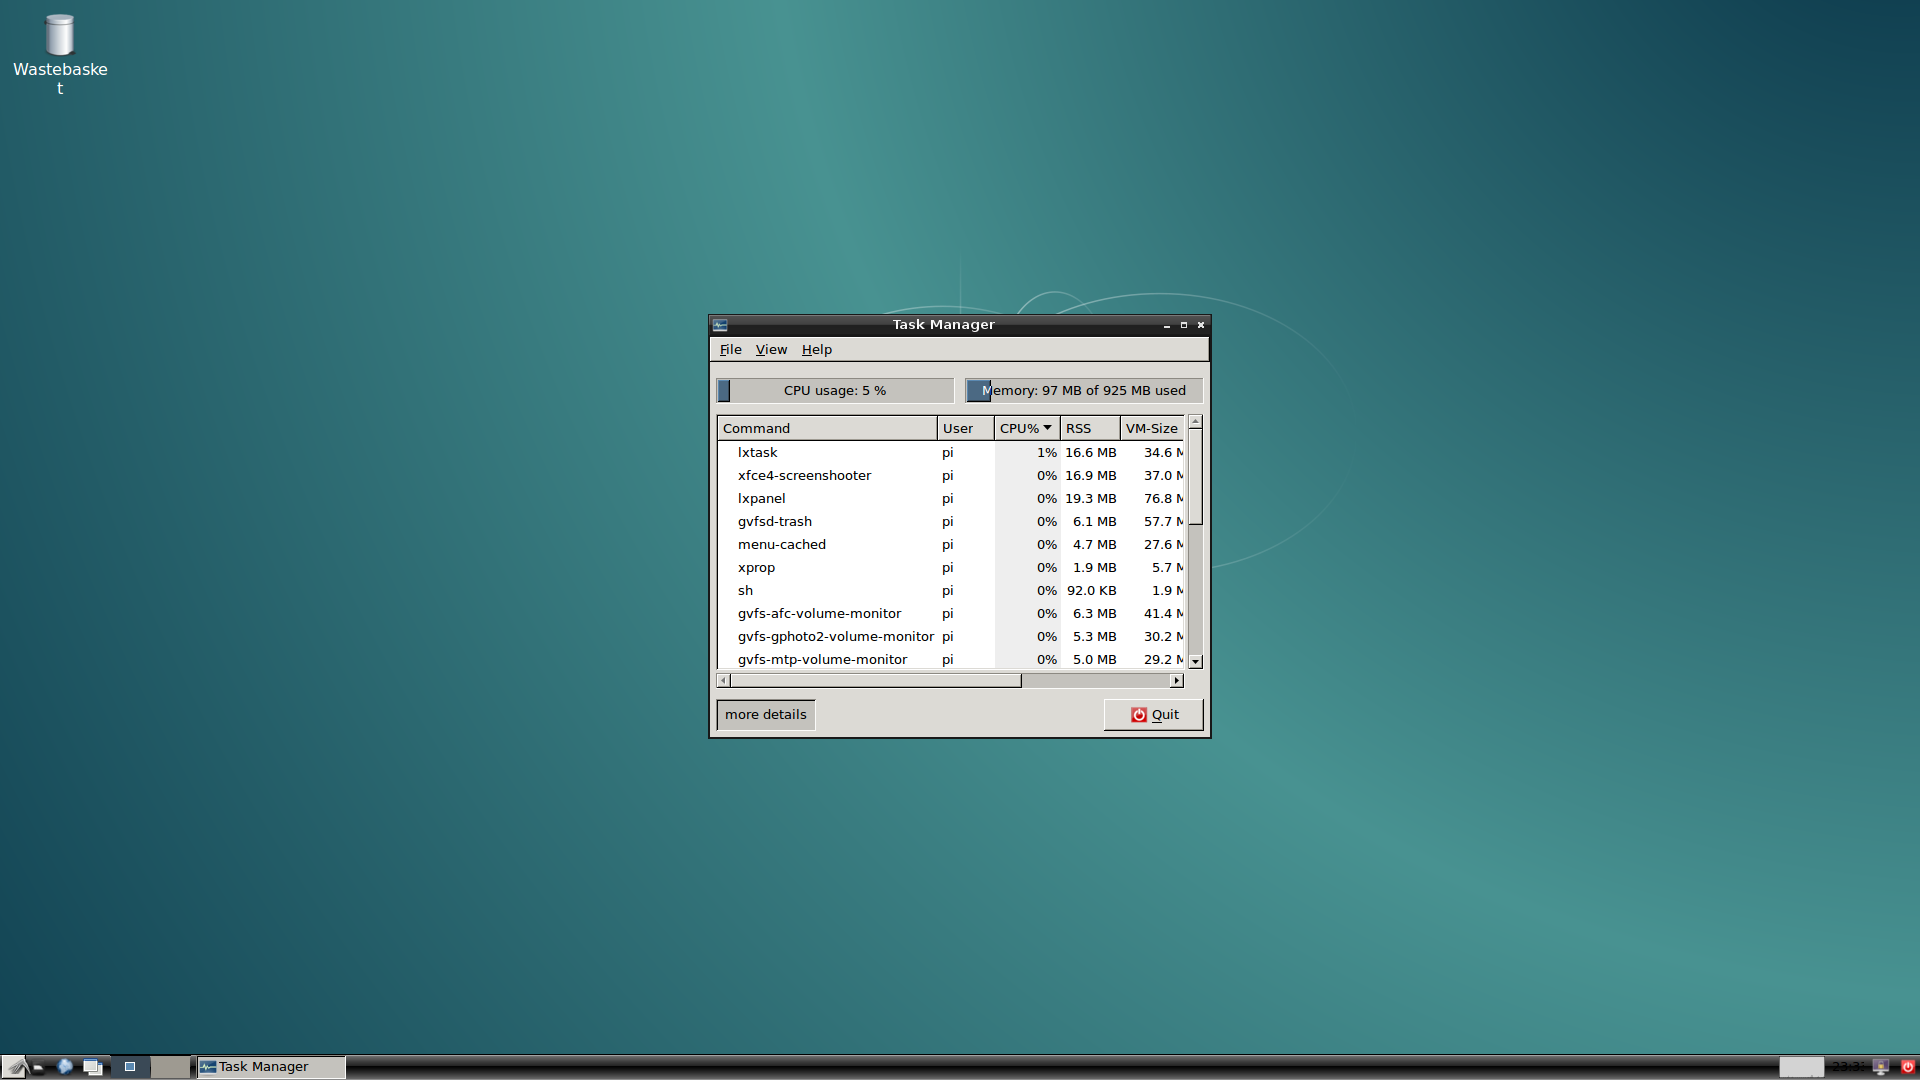
*Right Click > Open Image in New Tab to see full size image.
Here we see that Raspbian Lite with LXDE is using about 97MB of Memory.
If Raspbian Lite is running the XFCE Desktop Environment:

*Right Click > Open Image in New Tab to see full size image.
Here we see that Raspbian Lite with XFCE is using about 107MB of Memory.
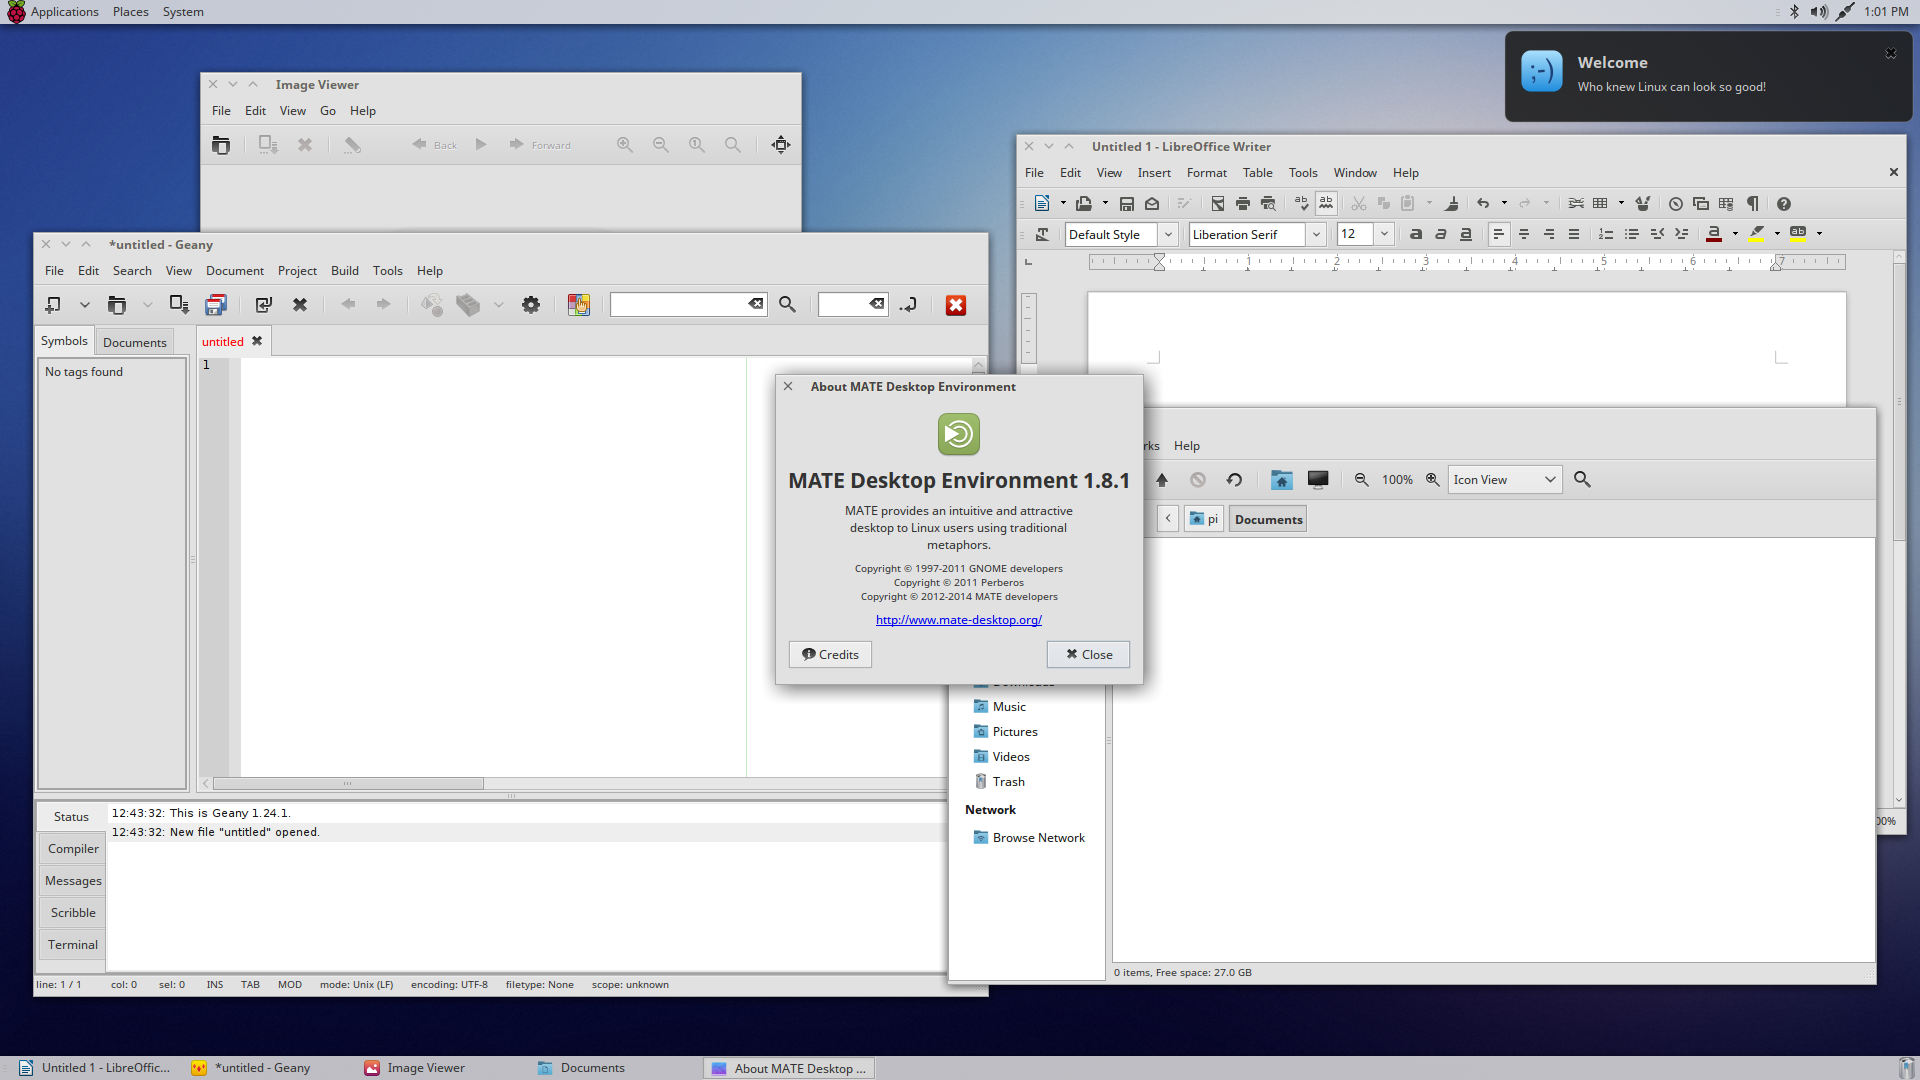
If Raspbian Lite is running the MATE Desktop Environment:
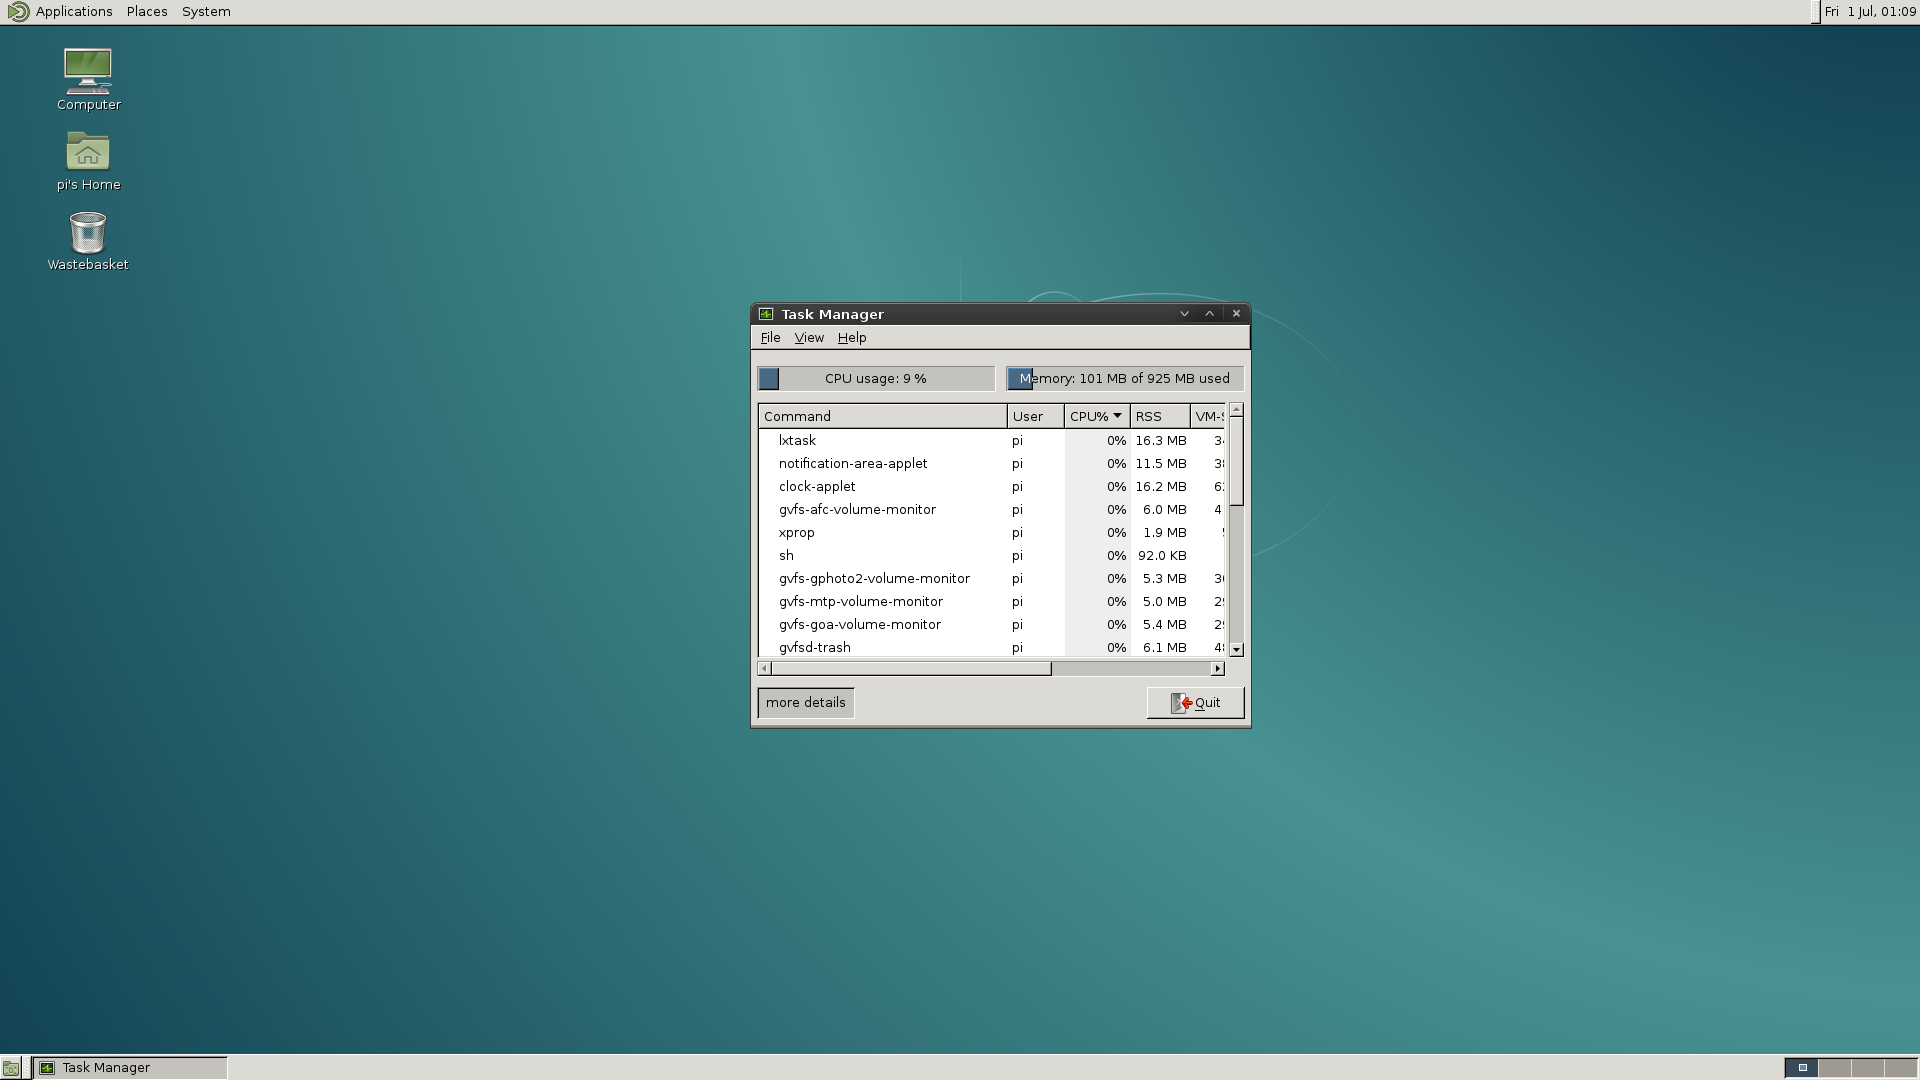
*Right Click > Open Image in New Tab to see full size image.
Here we see that Raspbian Lite with MATE is using about 101MB of Memory.
Running a desktop environment with Raspbian Lite can consume quite a bit of memory. Now, we have to remember that Linux operating systems are flexible. Not every package required for a desktop environment is needed to be installed. This means that memory usage (as well as storage space) can be lowered even further, but you would have to be very familiar with how a package as well as its dependencies work. Not installing a required package or dependency may bring unwanted behavior. However, the good news is that it won’t break your Raspberry Pi so long it is software related!
Part 1 – Build the Foundation
In this part, we will focus on preparing Raspbian Lite.
1. Download the latest Raspbian Lite image.
2. Format the SD / microSD card with Raspbian Lite (Plenty of guides out there on how to do this. For macOS, Linux, and Windows users, Etcher is an easy to use application that can help you do this.)
3. Insert the SD / microSD card into the Pi.
4. Connect the Pi to the Internet using an Ethernet cable. If you want to use Wi-Fi instead, you will have to read on how to configure your wireless receiver using the command line after your Pi has finished booting.
5. Connect your TV / Monitor and keyboard. (Mouse is optional at this time.) Turn on the Pi. The Pi should boot up successfully and a prompt to log in will appear.
6. Log into Raspbian. The username is pi and the password is raspberry.
7. We need to expand the file system so that Raspbian takes full use of the SD / microSD space. To do this, we need to use raspi-config. Type in:
- CODE: SELECT ALL
sudo raspi-config
and press Enter.
8. The Raspberry Pi Software Configuration Tool (raspi-config) main menu will appear. The option we are interested is option #1 (Expand Filesystem). Select that option using the arrow keys on your keyboard and press Enter. A message will appear saying that the boot partition has been resized. Select OK using arrow keys on your keyboard and press Enter. The main menu will reappear. Select Finish at the bottom of the menu and press Enter. A popup message will ask you to reboot your Raspberry Pi. Reboot the Pi.
9. Log into Raspbian again. We want to make sure we currently have the latest files and packages so type in:
- CODE: SELECT ALL
sudo apt-get update
and press Enter. If there are updates available, install them. To install the updates, you would type in the letter “y” when asked “Do you want to continue?” and then press Enter. When finished, the message “pi@raspberrypi:~ $” will appear signifying that the Pi is ready to receive a command. Now, type in:
- CODE: SELECT ALL
sudo apt-get upgrade
and press Enter. If there are updates available, install them. Now, type in:
- CODE: SELECT ALL
sudo apt-get dist-upgrade
and press Enter. If there are any updates available, install them.
If packages were updated and installed, then these packages were stored somewhere in the SD / microSD card. We need to delete them so that they don’t take up valuable space. To clean up leftover packages, type in:
- CODE: SELECT ALL
sudo apt-get clean
and press Enter.
10. At this time, you may want to configure your internationalization settings which include language, keyboard layout, and regional settings. To change this, we need to go back to raspi-config. Type in:
- CODE: SELECT ALL
sudo raspi-config
and press Enter.
The option we are interested is option #5 (Internationalization Options). Select that option and press Enter. You will be presented with 4 different options.
Begin by selecting option #I1 (Change Locale) and press Enter. Find your locale by scrolling through the list using the up and down arrow keys on your keyboard. By default, en_GB.UTF-8 UTF8 will contain an asterisk, meaning that Raspbian Lite is using this locale. However, this may be incorrect if you live in another country, like the US. You can deselect this locale by highlighting it and pressing the Space bar on your keyboard. For example, if you live in the US, then the locale used should be en.US.UTF-8 UTF8. You would find this locale on the list and then press the Spacebar to select it. An asterisk will appear meaning that this locale will be used. Once you are ready, press Enter. A popup will appear asking you to select the default locale used for the entire system. Select the same locale you selected previously by highlighting it using the up and down arrow keys and then press Enter. Raspbian Lite will configure your system automatically and return to the main menu.
NOTE: You may notice that after you have changed your locale, if you change other internationalization settings, you may get some text randomly popping up at the bottom of the screen saying that setting the locale has failed and that LC_CTYPE, LC_Message, LC_ALL complain that there is no such file or directory. No problem. Exit out of raspi-config and type in:
- CODE: SELECT ALL
sudo reboot
and press Enter. This will reboot your Pi. Now you can reopen raspi-config and you will no longer see that weird message. Don’t ask me why that hasn’t been fixed yet.
Return to the Internationalization Options menu by selecting option #5 and press Enter. Now configure your timezone by selecting option I2 (Change Timezone) and press Enter. Select your geological area using the arrow keys and press Enter. Select your region or city and press Enter. Raspbian Lite will configure your system automatically and return to the main menu.
Return to the Internationalization Options menu by selecting option #5 and press Enter. Now configure your keyboard layout by selecting option I3 (Change Keyboard Layout) and press Enter. Select your keyboard model using the arrow keys and press Enter (In a case where you don’t know what keyboard model to select, the Generic 105-key (Intl) PC keyboard model would be good choice). Now, you will select the keyboard layout. Select the appropriate keyboard layout and press Enter (If you don’t see your keyboard layout, select Other and press Enter. Select the keyboard language and press Enter. Now you will be presented with various keyboard layouts corresponding to your language. Select the appropriate layout and press Enter). The next few prompts may ask you about configuring the AltGr and Compose key. This is up for you to decide. Select the appropriate options and press Enter. You will then return to the main menu.
If you are using a Raspberry Pi 3, this microcomputer come equipped with a built in Wi-Fi/Bluetooth wireless receiver. You may want to change the Wi-Fi country settings. Return to the Internationalization Options menu by selecting option #5 and press Enter. Now configure your Wi-Fi country settings by selecting option I4 (Change Wi-Fi Country) and press Enter. Select your country using the arrow keys and press Enter. A confirmation message will appear confirming your selection. Select OK. You will return to the main menu.
12. Select Finish and press Enter. If you are asked to reboot, then reboot the Pi by selecting Yes and pressing Enter. If you are not asked to reboot, reboot anyways by typing in:
- CODE: SELECT ALL
sudo reboot
13. That’s it! The foundation has been built! The Pi is ready to be used now, well obviously without the GUI. We have built the house but there’s no furniture inside.
Part 2 – Bring in the Furniture
This next part focuses on installing a GUI on top of Raspbian Lite. In order to have a GUI, we need these 4 things:
1. Display Server
2. Desktop Environment
3. Window Manager
4. Login Manager
Since we need 4 things, to make life easier, these 4 things are:
1. Xorg Display Server
2. Pi Improved Xwindows Environment Lightweight (PIXEL) or Lightweight X11 Desktop Environment (LXDE) or XFCE Desktop Environment (XFCE) or MATE Desktop Environment (MATE)
3. Openbox Window Manager (PIXEL/LXDE) or XFWM Window Manager (XFCE) or Marco Window Manager (MATE)
4. LightDM Login Manager
For those that know about Linux, you may be wondering why the login manager chosen here is LightDM. For the most part, it is lightweight and it looks nice. But one feature that I believe stands out from other login managers is the ability to run Synergy client without errors. Synergy is a utility that allows you to use a computer’s mouse and keyboard (Windows, Mac, or Linux) and share it with another computer, in this case, a Raspberry Pi. Of course you can install another login manager if you don’t want LightDM.
Some users may not want a login manager. This is perfectly fine depending on how you will use your Raspberry Pi. For example, we may want the Pi to boot into the command line always and if there is a need to launch a desktop environment, a simple command will let you launch it. Continue to read on for more information.
Since we are focusing on Raspbian Lite, then the GUI installed will also be “lite”. I understand that “lite” can have different meanings, but beginners are the main focus here. The important thing here is for users to personalize their Pi, without relying on prebuilt Raspbian. I believe these are the best GUI options. As always, you are free to use whatever you want. Moving forward, we will be installing the core of PIXEL, LXDE, XFCE, or MATE. This will give us only the GUI. There won’t be any applications installed other than the required PIXEL, LXDE, XFCE, or MATE components such as a file manager, terminal, and settings.
1. Turn on your Pi and log in. We will install Xorg. To do this type in:
- CODE: SELECT ALL
sudo apt-get install --no-install-recommends xserver-xorg
and press Enter. There will be a lot of dependent packages to install but these must be installed for the GUI to work. Install the packages.
If you only install xserver-xorg, you will not have the ability to launch the Xorg Display Server from the command line. This would be a problem if you are not planning on installing a login manager. Otherwise, you do not need to do this. If this is the case, you may want to also install xinit by typing in:
- CODE: SELECT ALL
sudo apt-get install --no-install-recommends xinit
and press Enter. There will be some more dependent packages to install but these must be installed so that you can have the ability to start the Xorg Display Server from the command line if no login manager is installed. Install the packages.
—–
2. Now, choose your path:
PIXEL GUI
1 (PIXEL). Your reading this part because you want to install PIXEL right? Let’s continue. For this desktop environment, we will install the whole PIXEL desktop environment. This is to ensure that you get the same experience as if you are using the regular Raspbian distribution, but without preinstalled applications. Essentials such as settings, task manager, terminal and file manager are included. To install PIXEL type in:
- CODE: SELECT ALL
sudo apt-get install raspberrypi-ui-mods
and press Enter. There will be a lot of dependent packages to install but these must be installed for the GUI to work. Install the packages.
2 (PIXEL). Openbox Window Manager is installed by default when you install PIXEL. You do not need to do anything here.
LXDE GUI
1 (LXDE). Your reading this part because you want to install LXDE right? Let’s continue. We will be installing the LXDE core. When you install LXDE, some essentials such as settings, terminal and file manager are included. LXAppearance is used to change the look of applications such as panels, icons, progress bars, cursors, and so on. This is optional to install but I recommend installing it in order to give yourself more customization abilities. To install LXDE with LXAppearance type in:
- CODE: SELECT ALL
sudo apt-get install lxde-core lxappearance
and press Enter. There will be a lot of dependent packages to install but these must be installed for the GUI to work. Install the packages.
2 (LXDE). Openbox Window Manager is actually installed by default when you install lxde-core. You do not need to do anything here. You can customize the look of the titlebar using the Openbox settings which is also installed by default. By using LXAppearance and Openbox settings together, you chose what LXDE looks like!
Now, go to STEP 3.
XFCE GUI
1 (XFCE). Your reading this part because you want to install XFCE right? Let’s continue. We will be installing the XFCE core. When you install XFCE, some essentials such as settings and file manager are included. By default, XFCE uses XFCE4 Terminal. This is optional to install, however if you choose not to install it, then XTerm will be the default Terminal app.. To install XFCE with XFCE4 Terminal, type in:
- CODE: SELECT ALL
sudo apt-get install xfce4 xfce4-terminal
and press Enter. There will be a lot of dependent packages to install but these must be installed for the GUI to work. Install the packages.
2 (XFCE). XFWM Window Manager is actually installed by default when you install xfce4. You do not need to do anything here!
Now, go to STEP 3.
MATE GUI
1 (MATE). Your reading this part because you want to install MATE right? Let’s continue. We will be installing the MATE core. When you install MATE, some essentials such as settings, terminal, and file manager are included. To install MATE, type in:
- CODE: SELECT ALL
sudo apt-get install mate-desktop-environment-core
and press Enter. There will be a lot of dependent packages to install but these must be installed for the GUI to work. Install the packages.
2 (MATE). Marco Window Manager is actually installed by default when you install MATE. You do not need to do anything here!
Now, go to STEP 3.
————-
3 (STEP 3). Finally, we need to install LightDM login manager. If you have installed the full PIXEL desktop environment, the LightDM package is installed automatically so you can skip this step. Otherwise, to install LightDM, type in:
- CODE: SELECT ALL
sudo apt-get install lightdm
and press Enter. Install the packages.
If you choose not to install a login manager but you did install xinit earlier, then this means that everytime your Pi boots, you will always boot into the command line. However, the desktop environment is already set up for you and is ready to be launched at any time.
4. Everything we need to have Raspbian Lite with a GUI is ready! Fortunately, we don’t have to do anything else but reboot! Reboot your Pi. When it finishes booting, you will see the LightDM login screen. From here, you will need use both a keyboard and a mouse. Log in and you should now see either PIXEL, LXDE, XFCE, or MATE desktop!
Otherwise, if no login manager was installed, then just login via the command line! At anytime, you can launch the Xorg Display Server by typing in:
- CODE: SELECT ALL
startx
and press Enter. You should now see either PIXEL, LXDE, XFCE, or MATE desktop! From here, you will need use both a keyboard and a mouse.
5. So what now? This is where you decide what you want to do with your custom Rasbian Lite installation with a GUI. You can change the look, install applications, start programming, do what is necessary to make it work the way you want it to!
Sample Screenshots
NOTE: The screenshots shown below do not represent the desktop that you will see after installation. For more information, see the GUI Customization section. Be aware that using composition effects (transparency, shadows, etc.) may impact performance and memory usage depending on your configuration.
LXDE
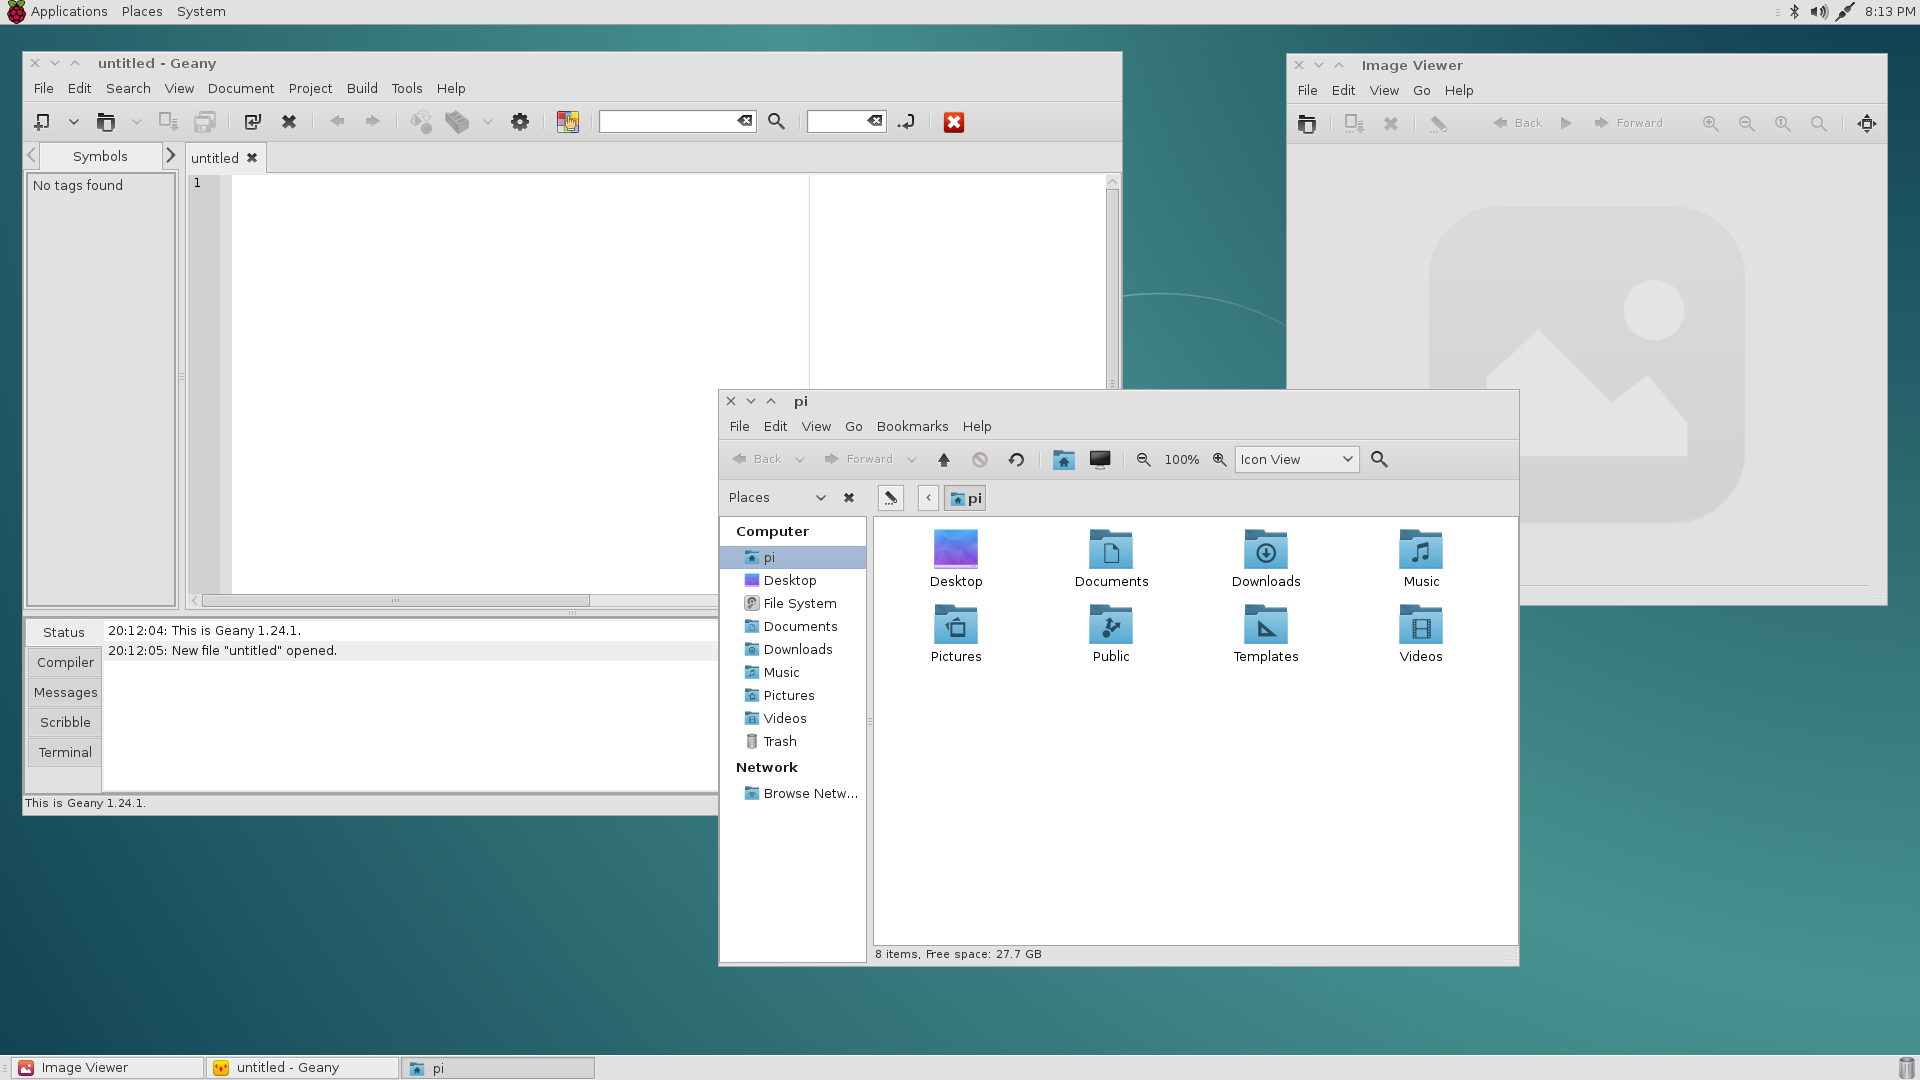
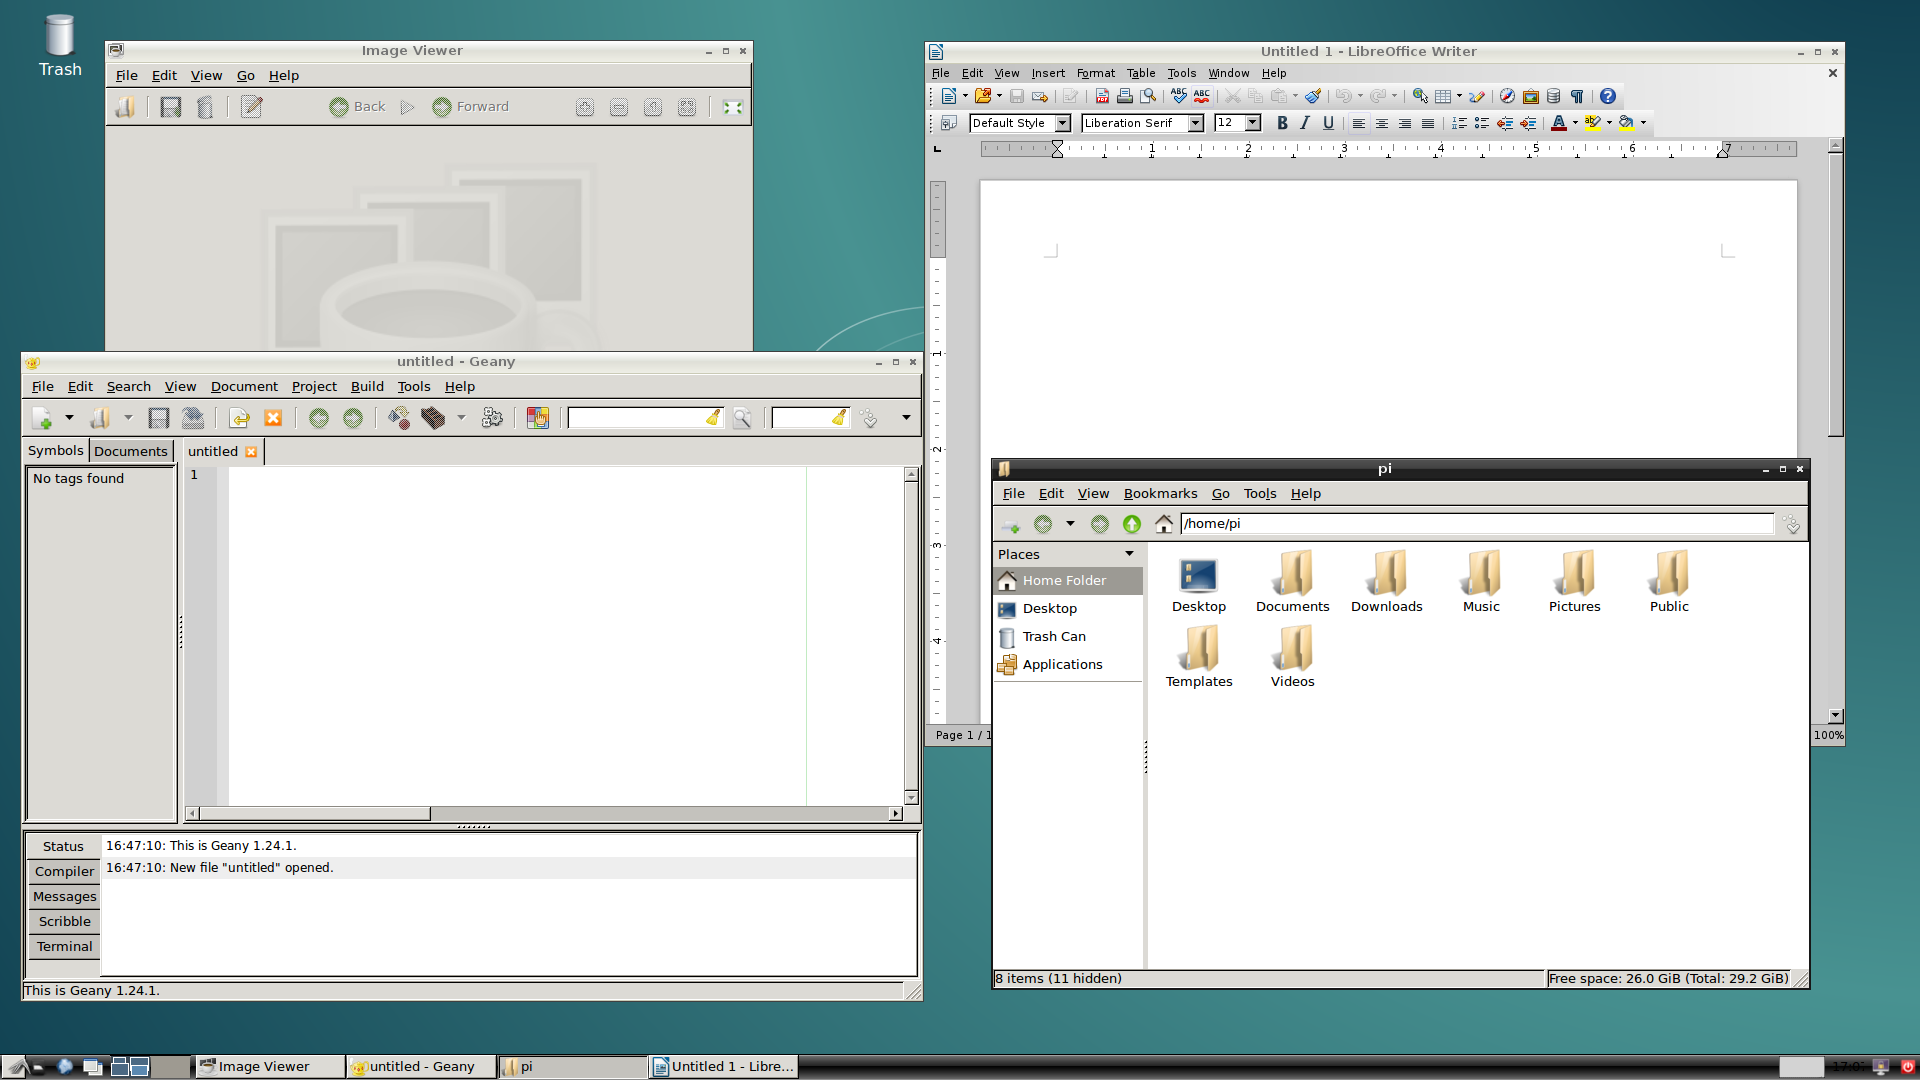
Right Click > Open Image in New Tab to see full size image. Screenshot shown is a customized LXDE desktop. The memory used will be at its minimal state when you have a fresh install (~97MB).
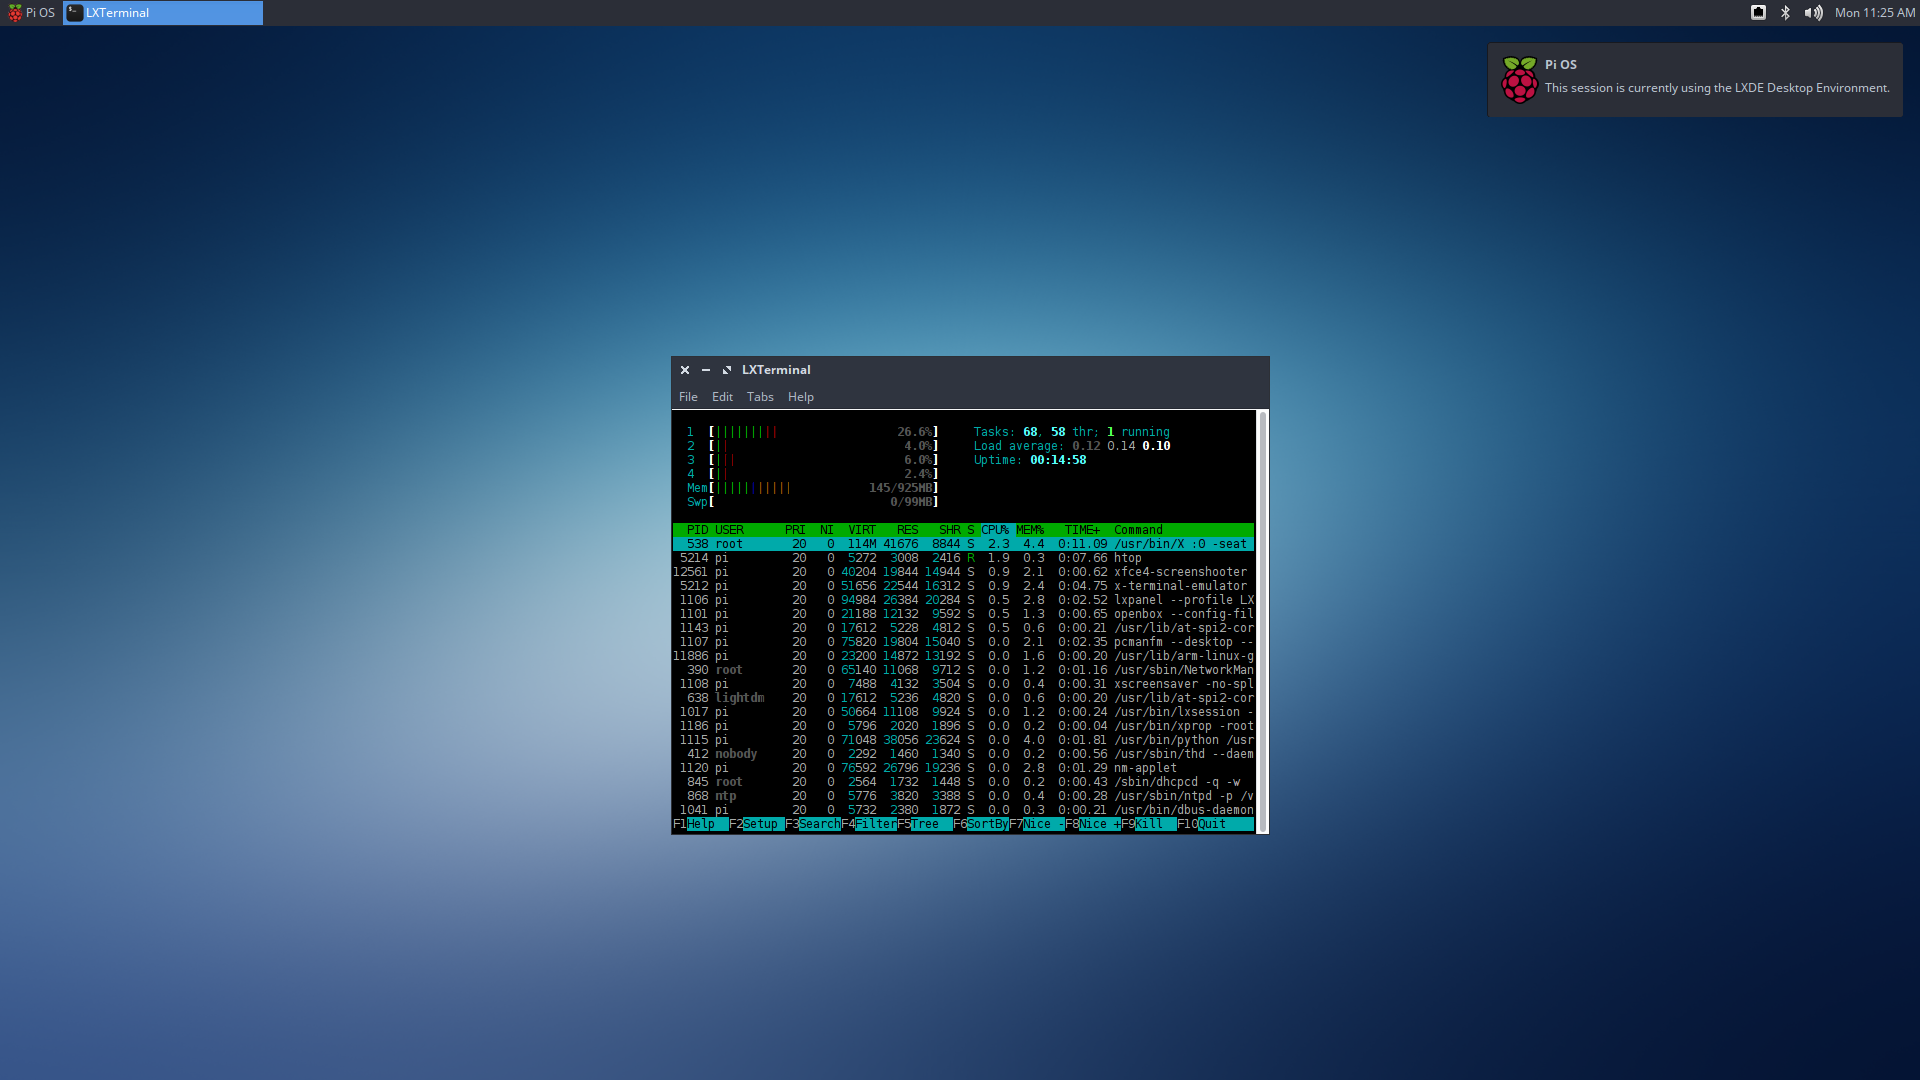
A clean desktop showing HTop System Monitor.
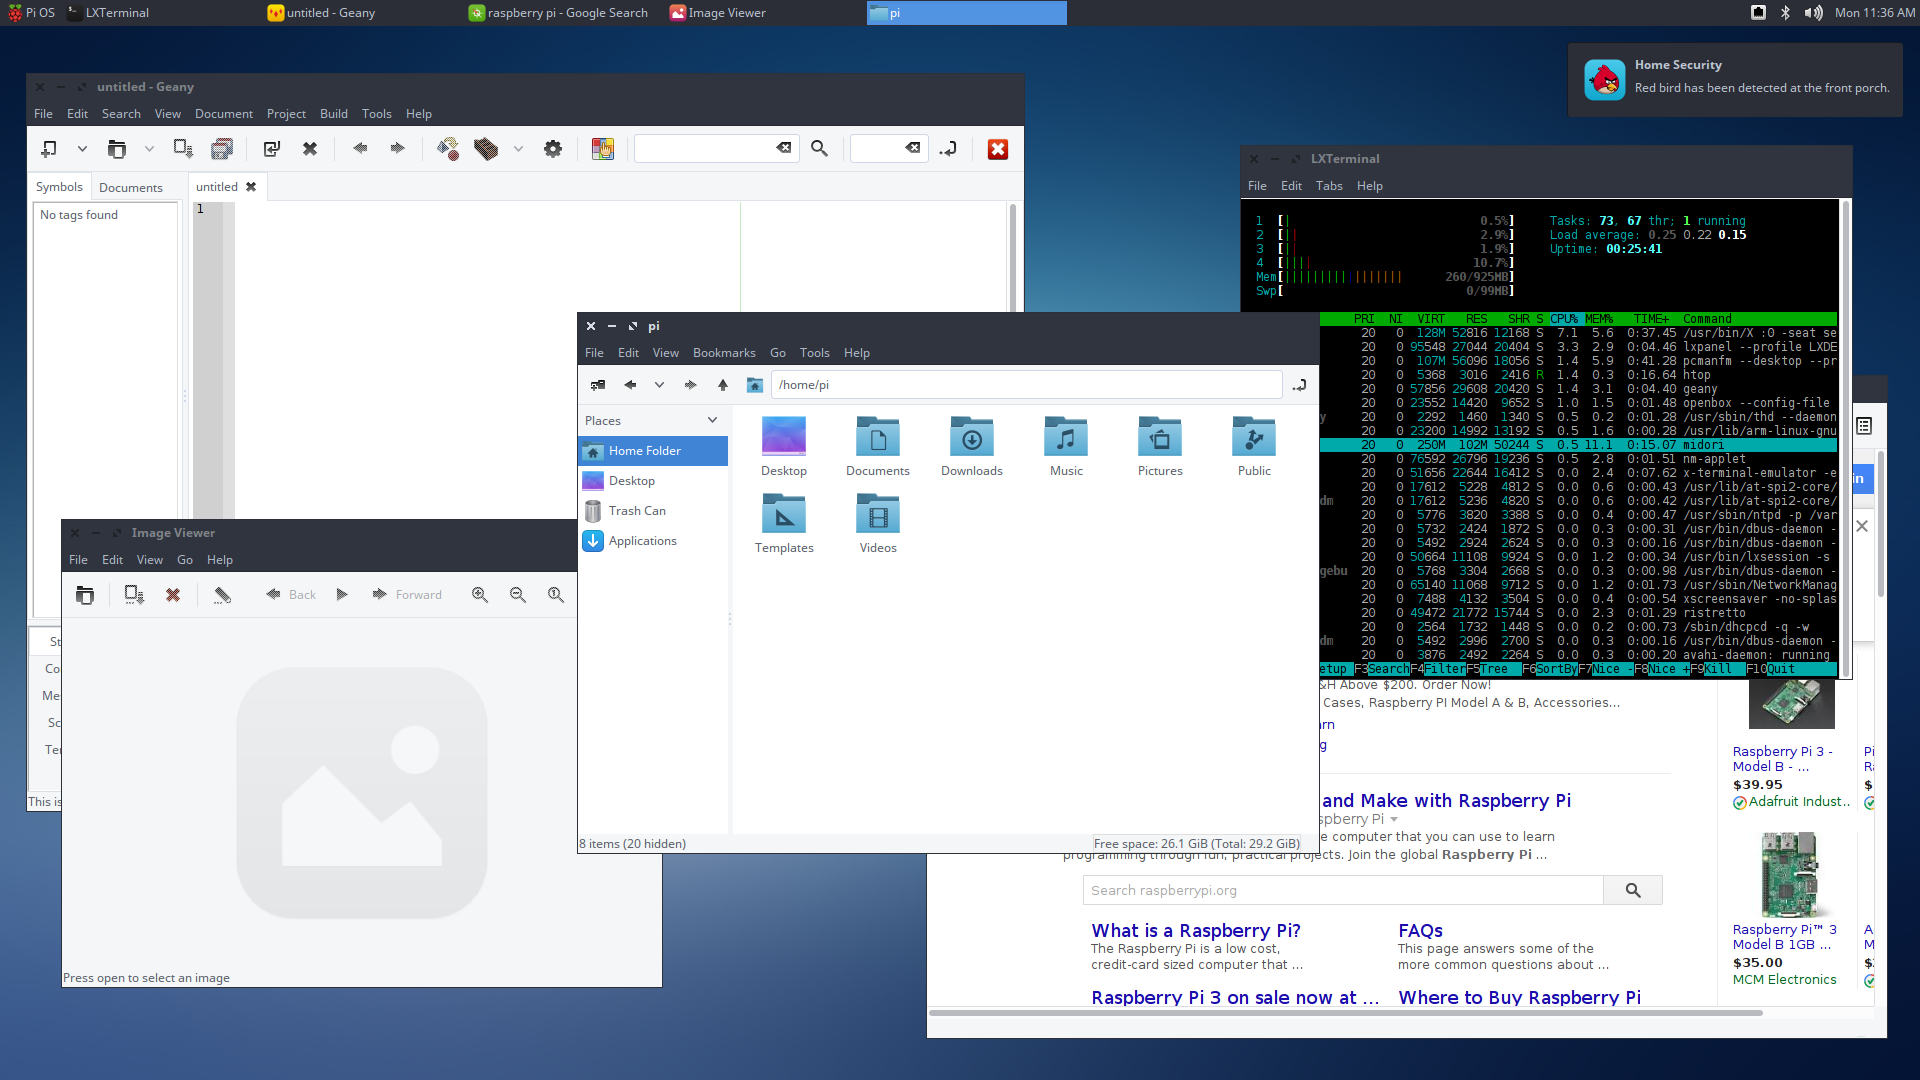
A desktop showing various windows opened.
XFCE
Right Click > Open Image in New Tab to see full size images. Screenshots shown are of a customized XFCE desktop. The memory used will be at its minimal state when you have a fresh install (~107MB).
A clean desktop showing HTop System Monitor. No composition effects enabled.
A desktop showing various windows opened. No composition effects enabled.
A desktop showing various windows opened. Composition effects enabled.
MATE
Right Click > Open Image in New Tab to see full size image. Screenshot shown is a customized MATE desktop. The memory used will be at its minimal state when you have a fresh install (~101MB).
GUI Customization
Before we begin, you may want to edit the config.txt file so that the native resolution and color depth of your display is used to its potential. For example, suppose that I want to configure a 1080p 60Hz LCD computer monitor that utilizes 32-bit color depth. All I need to do in the config.txt file is modify the following:
- CODE: SELECT ALL
hdmi_group=2

hdmi_mode=82

framebuffer_depth=32
By doing this, we are increasing the quality of the output display. You will need to modify those values accordingly. As for GUI customization, read the section that corresponds to the chosen desktop environment.
MATE Desktop Environment
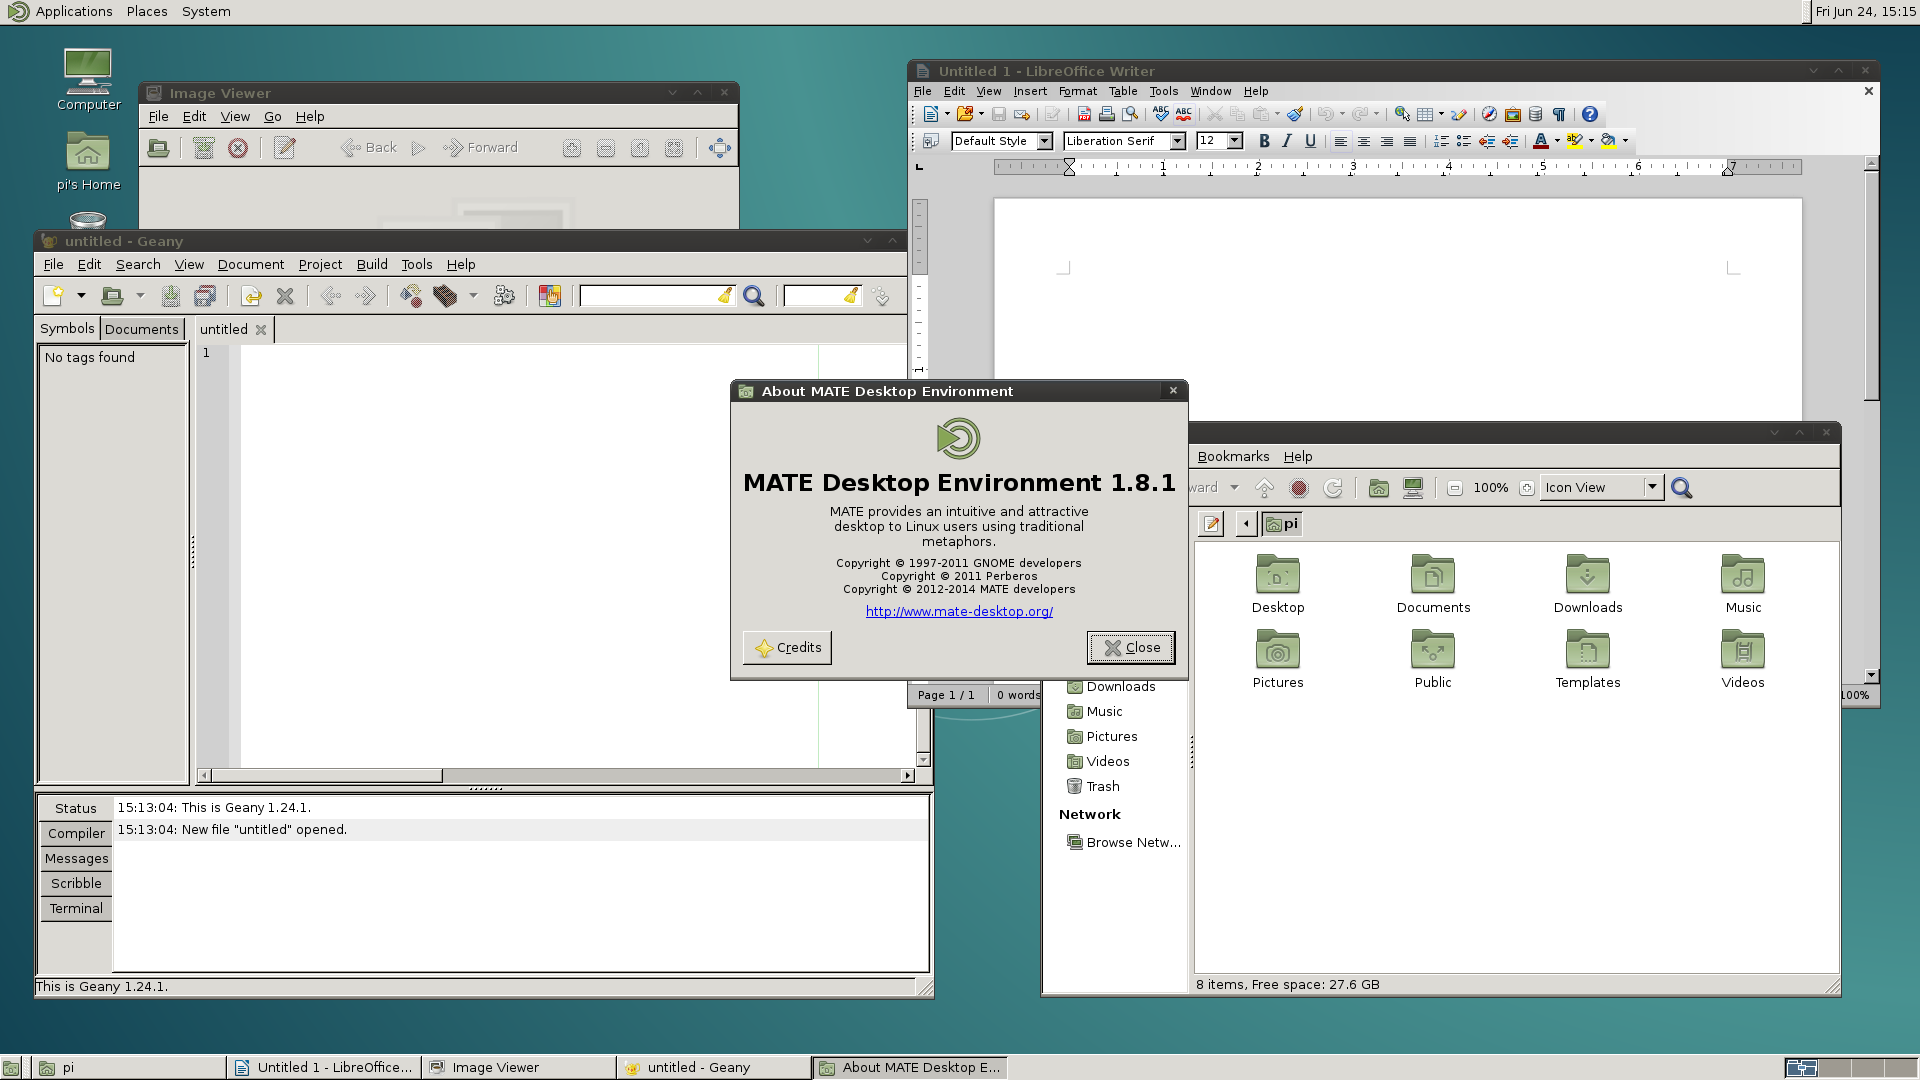
When you install the MATE desktop environment for the first time, you should see this:
*Remember, for any image posted in this thread, you can right click > Open Image in New Tab to see full size image.
It looks okay, but let’s face it, it just doesn’t have the modern look. So let’s fix that! There are many themes out there for MATE, and for this guide, I will install the theme that I think looks pretty. You are free to choose whatever theme you want if you don’t like the choice I made. You can use these instructions as a reference.
The theme that I will be working with is called Absolute by 2SEV. You can download it at gnome-look.org here: https://www.gnome-look.org/p/1080258/.
The actual theme will be in a tar.bz2 archive file. You will need an archive extractor to extract the contents. Once the archive has been extracted, you will see 8 folders called absolute, absolute-alt, absolute-center, absolute-center-alt, absolute-squared, absolute-squared-alt, absolute-squared-center, and absolute-center-squared.
All of these 8 folders need to be moved to /usr/share/themes. By default, MATE includes Caja File Manager, but we cannot modify this directory unless we have root privileges. If you are using Caja File Manager, you will need to install and modify gksu. Install gksu by going into Terminal and type:
- CODE: SELECT ALL
sudo apt-get install gksu
and press Enter. Once gksu has been installed, we need to configure it so that it recognizes the currently logged in user. Go into Terminal and type in:
- CODE: SELECT ALL
gksu-properties
and press Enter. A small window will open. Under Behavior, change Authentication mode to sudo. You can now close this window.
To run Caja File Manager with root privileges, you can now go to Terminal and type in:
- CODE: SELECT ALL
sudo caja
and press Enter. You might get a popup warning saying that the application opened without asking for a password. If you do, ignore the warning and close the popup window. Now go to /usr/share/themes. Drag the 8 theme folders into here.
The theme Absolute is now installed. However, we cannot use it yet. This theme requires the gtk2-engines-murrine package which is not installed by default. To install gtk2-engines-murrine, open Terminal and type in:
- CODE: SELECT ALL
sudo apt-get install gtk2-engines-murrine
and press Enter. Once this package installs successfully, you are now ready to apply this theme.
Go to System > Preferences > Appearance. Under the Themes tab, select the desired Absolute theme. In my case, I chose the absolute-squared-alt theme. After selecting the theme, restart your Raspberry Pi. This is to make sure that there are no glitches when using the theme. After restart, you should have something like this:
It looks better, but personally, I think we can do even more better. How about icons? My favorite iconset is Vibrancy Colors by Ravefinity. You can download them here: http://www.ravefinity.com/p/vibrancy-colors-gtk-icon-theme.html.
If you scroll down, you should see download links to download the icons in a debian package. Download the debian package. Once downloaded, open Terminal and change the working directory to the directory to where you downloaded the package to. To install the debian package, type in:
- CODE: SELECT ALL
sudo dpkg -i vibrancy-colors_2.7~xenial~Noobslab.com_all.deb
and press Enter. It will take a while.
After the package has been installed, we need to enable the icon theme. Go to System > Preferences > Appearance. Under the Themes tab, select the theme that you are currently using and then click the Customize button. The Vibrancy Colors Icon theme is under the Icons tab. Since this theme is a light theme, then the perfect icon theme would be Vibrancy Light. There are variants of the Vibrancy Light icon theme so I chose the Vibrancy Light Aqua icon theme. After you choose your icon theme, restart your Raspberry Pi. After restart, you should have something like this:
Isn’t it pretty? You can stop here but we can still do better! Let me tidy up the desktop. I removed the desktop icons, modified the bottom panel to show just the window list, changed the look of the time, changed the window buttons to the left, and changed the distribution logo on the Main Menu applet to the Raspberry Pi logo.
Knowing some people, you may want to know how to hide the desktop icons, or change the window buttons, or change the distribution logo. No problem, let’s go behind the scenes!
If we are using the Caja File Manager, there is no way of hiding the desktop icons for Computer, Home Folder, and Trash. Similarly, there is no way to change the Window buttons. We will need to do this manually using an application called dconf Editor.
You can install dconf Editor by going to Terminal and type in:
- CODE: SELECT ALL
sudo apt-get install dconf-tools
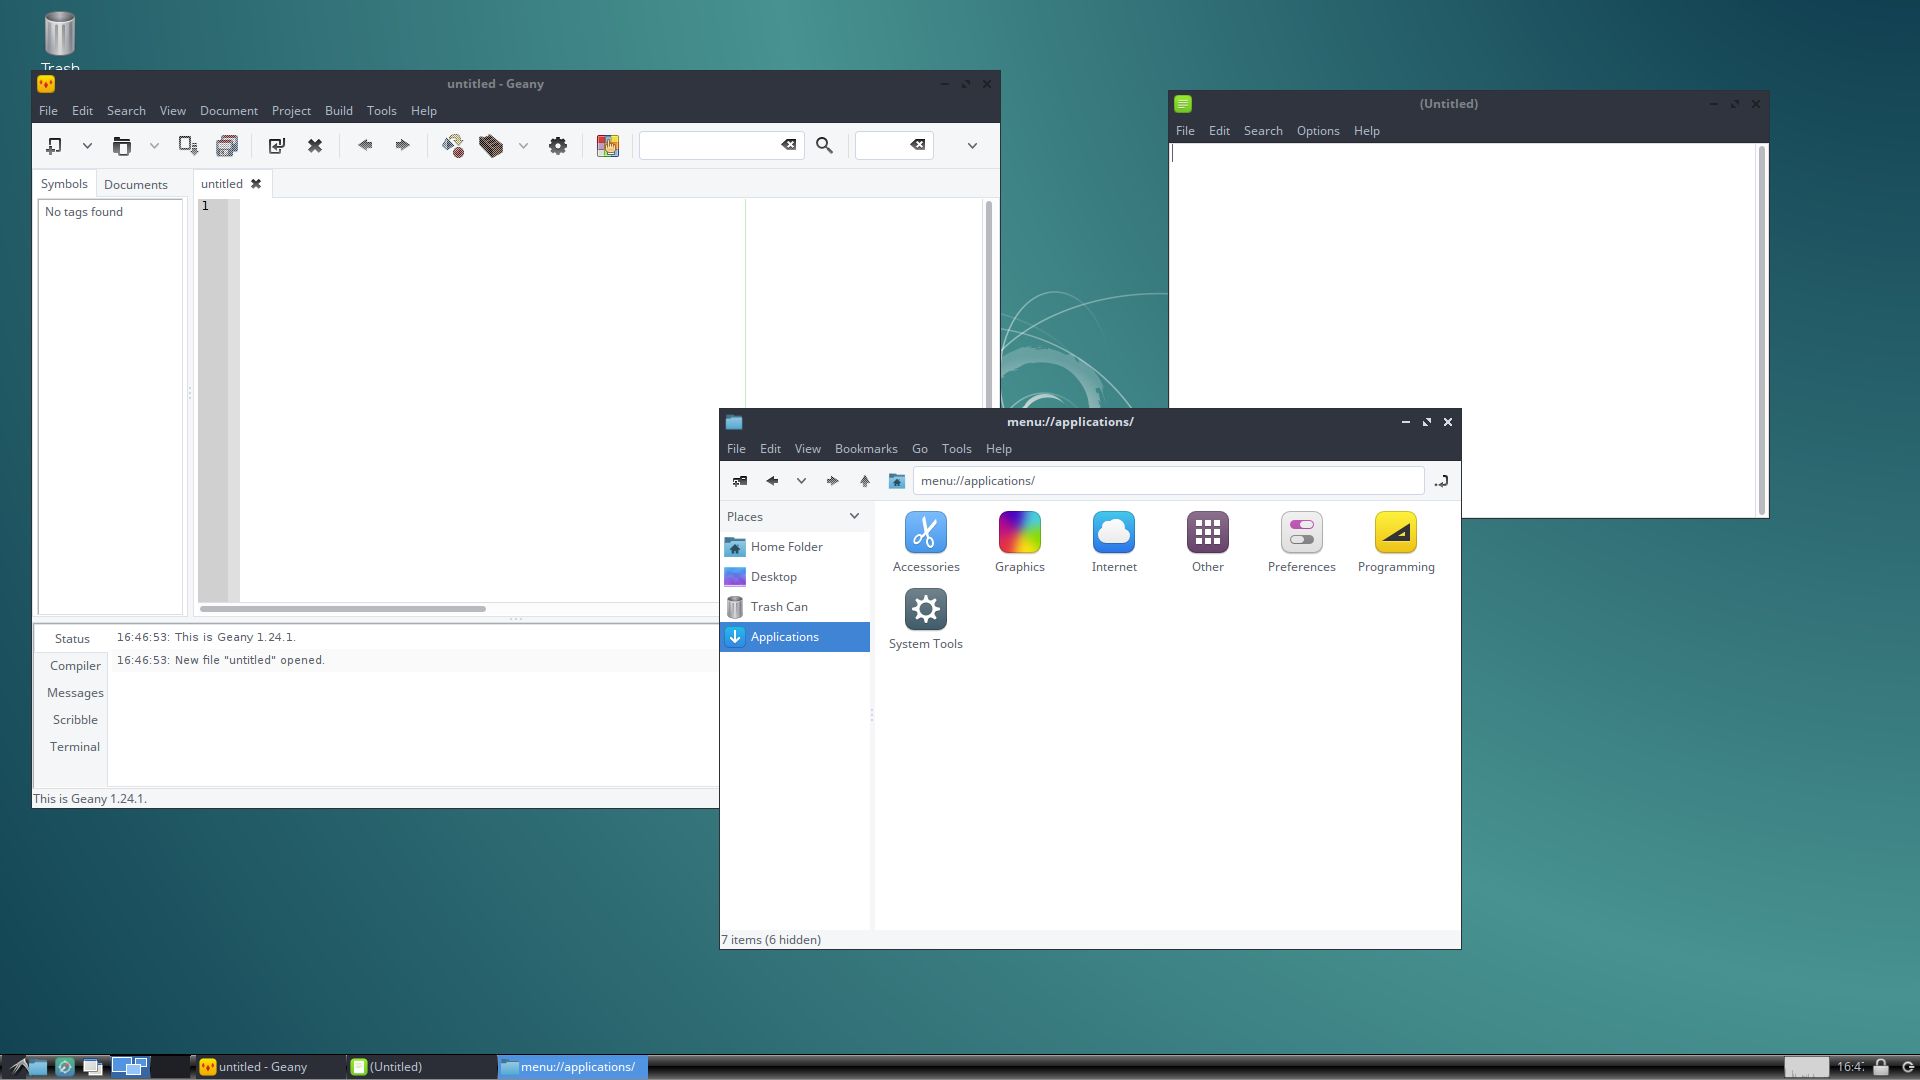
and press Enter. Once it installs, open it by going to Applications > System Tools > dconf Editor.
In order to remove the desktop icons, using the left panel, go to org > mate > caja > desktop. Then uncheck computer-icon-visible, home-icon-visible, and trash-icon-visible. That should remove those icons.
To move the window buttons to the left, using the left panel, go to org > mate > marco > general, and look for button-layout. You will see that the default value is menu:minimize,maximize,close. Change it to:
- CODE: SELECT ALL
close,minimize,maximize:
and press Enter. The change will be immediately seen. Doing this also removes the small dot button on the titlebar which opened the Window menu. You can always right click on the titlebar to get to the same menu.
The distribution logo on the Main Menu applet can be changed by replacing the icon start-here.svg in /usr/share/icons/<NAME OF VIBRANCY ICON THEME>/places/scalable to a custom icon with the same name and same svg format. Remember, to change the icon in this directory, you must run Caja File Manager or any other File Manger with root privileges. I just changed this icon to a Raspberry Pi svg icon that I found on the Internet. After you change the icon, you should restart your Raspberry Pi so that the changes can take effect. Else, you can change the icon theme to another one and change it back to the one you were using before.
After all of these changes, this is what I have now:
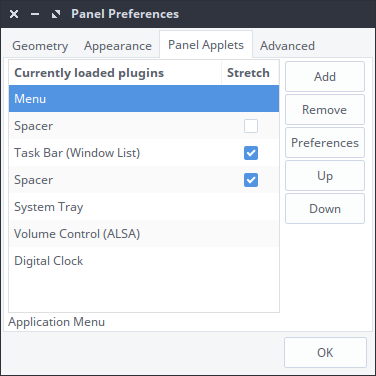
If you notice, we don’t have any useful panel applets in our panel. I generally like to have the trash bin on the bottom panel, and then volume, network, and bluetooth at the top.
To do this, we will need to install mate-applets. Open Terminal and type in:
- CODE: SELECT ALL
sudo apt-get install mate-applets
and press Enter. After installation, restart your Raspberry Pi. If you right click on a panel and select Add to Panel, there will be a number of applets to choose from to add to your panels. The Trash applet can be found here. I added the Trash applet to the bottom right of the bottom panel.
For the network, volume, and bluetooth indicators to appear, the notification area applet must be added to the panel. In this case, I chose to put it at the top next to the clock. By default, only the volume icon should appear.
To get the network icon to show, you will need to install a network manager. I prefer to use Gnome Network Manager since I’m familiar with it. If you choose to install Gnome Network Manager, open Terminal and type in:
- CODE: SELECT ALL
sudo apt-get install network-manager-gnome
and press Enter. The network icon will not appear unless you restart. In order to use Gnome Network Manager, you have to make sure that it manages all network interfaces. By default, Raspbian controls this. To let Gnome Network Manager manage all network interfaces, open Terminal and type in:
- CODE: SELECT ALL
sudo nano /etc/network/interfaces
and press Enter. Modify this file so that it looks like this:
- CODE: SELECT ALL
# interfaces(5) file used by ifup(8) and ifdown(8)# Please note that this file is written to be used with dhcpcd
# For static IP, consult /etc/dhcpcd.conf and ‘man dhcpcd.conf’# Include files from /etc/network/interfaces.d:
#source-directory /etc/network/interfaces.dauto lo
iface lo inet loopback#iface eth0 inet manual
#allow-hotplug wlan0
#iface wlan0 inet manual
# wpa-conf /etc/wpa_supplicant/wpa_supplicant.conf#allow-hotplug wlan1
#iface wlan1 inet manual
# wpa-conf /etc/wpa_supplicant/wpa_supplicant.conf
Save the file and restart your Raspberry Pi. After restart, if you click on the network icon, all wired and wireless networks will appear. Configure your network settings if needed.
The last indicator to configure is Bluetooth. By default, there is no Bluetooth Manager in MATE so we will need to install one. I prefer to use Blueman. To install Blueman, open Terminal and type in:
- CODE: SELECT ALL
sudo apt-get install blueman
and press Enter. Restart your Raspberry Pi and now the Bluetooth icon should appear in the notification area.
So let’s see what we have so far.
It looks like we’re done right? It depends. The smallest things always make a huge difference. In other words, we need a beautiful font to complement our beautiful desktop right? Let’s continue.
The font that you see in the Sample Screenshots section is called Noto. I think it looks good. To install this font, open Terminal and type in:
- CODE: SELECT ALL
sudo apt-get install fonts-noto
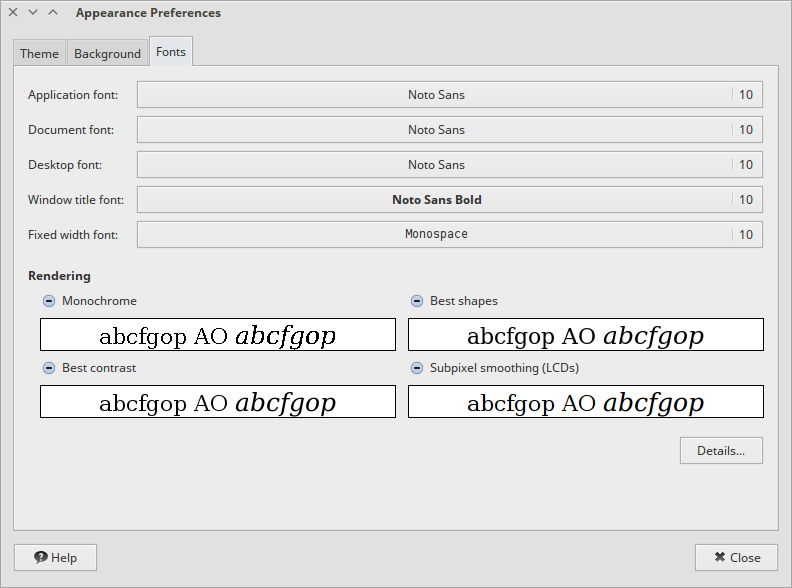
and press Enter. To change the system font, go to System > Preferences > Appearance and click on the Fonts tab. Adjust your fonts settings. These are the fonts settings I use:
Let’s add the finishing touches. A new installation of MATE does not come with a notification system. We can easily install it by opening Terminal and typing in:
- CODE: SELECT ALL
sudo apt-get install mate-notification-daemon libnotify-bin
and then press Enter. You can customize the theme of the notifications by going to System > Preferences > Pop-Up Notifications. The theme for the notifications that I chose was Slider.
Finally, add a nice wallpaper and you’re done!
Before
After
Interestingly, if you enable desktop composition effects, the Raspberry Pi seems to run smoother with MATE. Not sure why but can’t complain.
LXDE Desktop Environment
The first time you boot to the LXDE desktop, you will probably see this:

The panel on the bottom is ugly. The menu button is cutoff, the clock text is black, and the black panel background isn’t helping it. I don’t know why that is the default look. Let’s open some applications and see how that looks like:
If you compare this screenshot to a Windows, macOS, or other Linux based distro desktops, you will find that the default LXDE desktop look is outdated. It is in dire need of a makeover!
If we’re going to make LXDE look good, it has to stand out.
The perfect theme that I think can achieve this is called Arc by horst3180. You can download it from openSUSE here: http://software.opensuse.org/download.html?project=home%3AHorst3180&package=arc-theme. To download it, click on the Debian icon and then click on the “show” button next to “Grab binary package directly”. You should now see a download link to the deb file. Download it.
Before we install Arc theme, we will need to install the required theme engines to make it work as specified by the author. Remember, most theme authors tell their users what requirements are needed to make their theme work. Open Terminal and type in:
- CODE: SELECT ALL
sudo apt-get install gtk2-engines-murrine gtk2-engines-pixbuf gtk3-engines-unico
and press Enter. After installation, restart your Raspberry Pi.
Now we need to install the deb package. Open Terminal and change the working directory to where the deb file has been downloaded. Then to install the deb package, type in:
- CODE: SELECT ALL
sudo dpkg -i arc-theme_1465131682.3095952_all.deb
and press Enter. Now the theme has been installed.
To change the inside look of applications, you will need to have lxappearance installed. If you haven’t done so, open Terminal and type in:
- CODE: SELECT ALL
sudo apt-get install lxappearance
and press Enter. Go to Preferences > Customize Look and Feel. On the Widget tab, select the Arc theme to use from the left sidebar. I chose Arc-Darker theme. So this is what we have now:
It turns out that the author of the Arc theme did not create an Openbox Window theme. This explains why the window borders don’t match with the overall theme. However, there is no problem. A person named dgalva created an Arc Openbox theme that we can easily install and use. You can download the Arc Openbox theme here: https://github.com/dglava/arc-openbox. Click on the “clone or download” button and then click on “Download Zip”. You will need an archive extractor to extract the contents.
Once you extract the ZIP archive, go to Preferences > Openbox Configuration Manager. In the Themes tab, click on the “Install a new theme…” button. Now, navigate to where you extracted the zip archive. Inside the arc-openbox-master folder, you will see two important files, arc.obt and arc-dark.obt. Click on one of them and click on OK. Repeat the same prices for the other obt file. You should now see both the Arc and Arc-Dark theme in the Theme tab. Select the appropriate Arc window theme. The window theme should apply automatically. Since I’m using the Arc-Darker theme, then the appropriate window theme is Arc-Dark. You should now have something like this:
So now the application and window themes are matching!
Now lets deal with the icons. If you read the MATE Desktop Environment customization part, you will know that I love the Vibrancy Colors iconset by Ravefinity. Let’s use that iconset! You can download them here: http://www.ravefinity.com/p/vibrancy-colors-gtk-icon-theme.html.
If you scroll down, you should see download links to download the icons in a debian package. Download the debian package. Once downloaded, open Terminal and change the working directory to the directory to where you downloaded the package to. To install the debian package, type in:
- CODE: SELECT ALL
sudo dpkg -i vibrancy-colors_2.7~xenial~Noobslab.com_all.deb
and press Enter. It will take a while.
After the package has been installed, we need to enable the icon theme. Go to Preferences > Customize Look and Feel. Inside the Icon Theme tab, select the appropriate Vibrancy Colors icon theme. Since the theme that I chose is a mixture of black and white, then Vibrancy Colors Dark is the preferred choice. I chose the Vibrancy Dark Aqua icon theme since I prefer blue folders. Restart your Raspberry Pi after applying the icon theme. After restart, this is what you might have:
It looks great. But that bottom panel is an eyesore. We are still not done yet. For some reason, the current font is bothering me. Let’s fix that right now.
The font that you see in the Sample Screenshots section is called Noto. I think it looks good. To install this font, open Terminal and type in:
- CODE: SELECT ALL
sudo apt-get install fonts-noto
and press Enter. To change the system font, go to Preferences > Customize Look and Feel and click on the Widget tab. At the bottom, there should be a Default font button. Click on it and adjust your default font settings. In this case, I changed it to Noto Sans with Regular style with a size of 10.
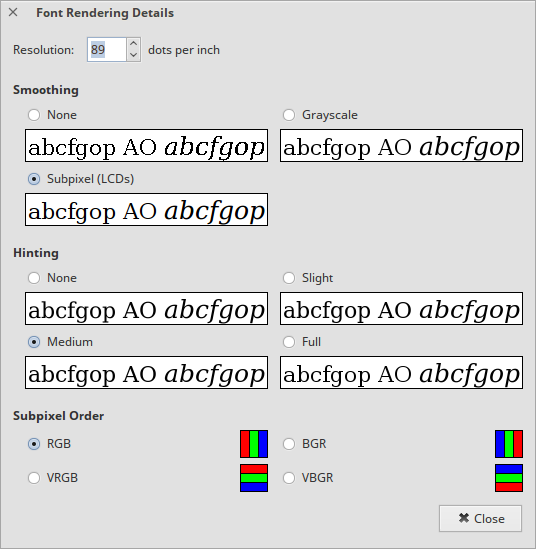
In the fonts tab, antialiasing and hinting are enabled. The hinting style I chose was Medium and the Sub-pixel geometry is set to RGB.
If you notice in those screenshots, the titlebar font look ugly. When we agreed earlier that LXDE has to look good, we meant it. Unfortunately, the LXDE team did a poor job in allowing causal users to change the titlebar font look. We need to get our hands dirty. Simply open Terminal and type in:
- CODE: SELECT ALL
cd ~/
and press Enter. This will take us to your home directory. Now type in:
- CODE: SELECT ALL
nano .Xresources
and press Enter. This will create a new file where you can type some code using nano. Type in the following code:
- CODE: SELECT ALL
Xft.dpi: 89

Xft.antialias: true

Xft.rgba: rgb

Xft.hinting: true

Xft.hintstyle: hintsmedium
This code will modify the dpi, antialias, rgba, hinting, and hint style of the titlebar. Remember, you can always modify this to your own preferences if you like.
- CODE: SELECT ALL
Xft.dpi: A numerical value (default = 96)

Xft.antialias: true or false

Xft.rgba: none or rgb or bgr or vrbg or vbgr

Xft.hinting: true or false

Xft.hintstyle: hintslight or hintsmedium or hintsfull

Save the file by pressing CTRL + X, type in Y to accept changes, and press Enter to save. For the changes to take effect, you must log out and log back in.
NOTE: You may get an error after you log in saying “Xsession: warning XRDB command not found: X resources not merged.” This is because x11-xserver-utils is not installed. To fix this, open Terminal and type in:
- CODE: SELECT ALL
sudo apt-get install x11-xserver-utils
and press Enter.
Now we need to change the fonts that the titlebar uses. Go to Preferences > Openbox Configuration Manager. In the Appearances tab, change the fonts to your desired settings. These are the fonts settings I use:
If you notice, the titlebar font looks so much better. Now that we have finished fixing our fonts, lets see what we have:
Let me do some modifications. I’m going to move the window buttons to the left, move the titlebar text to the left, change the desktop icon font to Noto Sans, remove the trash icon from the desktop, remove the icons from buttons, and delete the bottom panel and create a new panel on top. The window buttons can be modified using Openbox Configuration Manager, the desktop icons can be removed by using Desktop Preferences and navigating to the Desktop Icons tab and unchecking “Show Trash Can folder on the desktop”, the desktop icon font can be changed using Desktop Preferences under the Appearance tab, and the icon buttons can be removed using Customize Look and Feel and navigating to the Other tab and unchecking “Show images on buttons”.
In order to move the titlebar text to the left of the window so that it is next to the window buttons, I would have to get my hands dirty and modify the theme. Maybe you are curious to see how this is done? Let’s go behind the scenes.
LXDE uses the Openbox Window Manager. Most themes that are compatible with LXDE will have an Openbox theme configuration file. With this file, you can modify the window border look, titlebar shadow, menu border color, and other sorts of settings. In order to modify this file, we first must know where this file is.
Normally, this file is located inside /usr/share/themes/<NAME OF THEME>/openbox. This file we are interested in is called themerc.
In my case, the Openbox window theme is called Arc-Dark. Since we used the Openbox Configuration Manager to install the Arc Openbox theme, the theme is not located in /usr/share/themes, but instead it is located in our user themes folder, ~/.themes. By opening the Arc-Dark folder and then opening the openbox-3 folder, we can see the themerc file. The good thing is that we do not need root permissions to edit it.
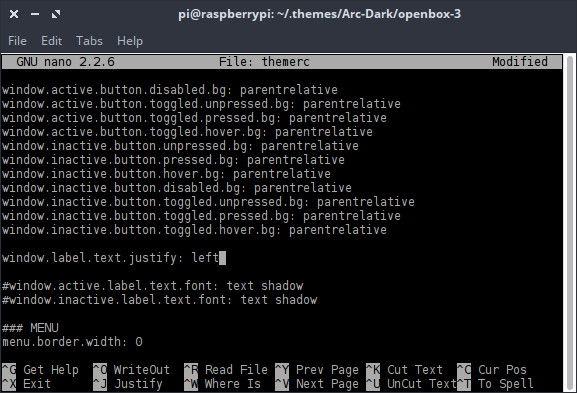
You can edit the themerc file using a text editor or with Terminal using the nano command. I’ll be using Terminal. By changing the working directory to this location, I can use nano to edit this file.
If you scroll down, under #Window, you will see a setting called window.label.text.justify. By default, it is set to center. I changed it to left so that the titlebar text displays on the left side.
That’s all that I changed in the file for now. Then I just save the file and for the changes to take effect, I just logged out and logged back in again.
With all the changes I made, this is how LXDE looks like:
Now let’s finally deal with the panel. Create a new panel and place it on top of the screen. Then delete the bottom panel. If you notice, the panel that you create automatically gets the Arc theme. The panel will either be dark or light depending on the variant theme you selected. Here are the panel applets that I chose to display on the top panel:
and this is what the desktop looks like now:
The menu button has a Raspberry Pi icon that I found on the Internet, and the time has a certain string that makes it look that way. The last thing missing are the network and bluetooth icons on the panel. For these I just use Gnome Network Manager and Blueman. Remember, for these icons to appear, you must have the system tray applet in the panel.
If you choose to install Gnome Network Manager, open Terminal and type in:
- CODE: SELECT ALL
sudo apt-get install network-manager-gnome
and press Enter. The network icon will not appear in the system tray unless you restart. In order to use Gnome Network Manager, you have to make sure that it manages all network interfaces. By default, Raspbian controls this. To let Gnome Network Manager manage all network interfaces, open Terminal and type in:
- CODE: SELECT ALL
sudo nano /etc/network/interfaces
and press Enter. Modify this file so that it looks like this:
- CODE: SELECT ALL
# interfaces(5) file used by ifup(8) and ifdown(8)# Please note that this file is written to be used with dhcpcd
# For static IP, consult /etc/dhcpcd.conf and ‘man dhcpcd.conf’# Include files from /etc/network/interfaces.d:
#source-directory /etc/network/interfaces.dauto lo
iface lo inet loopback#iface eth0 inet manual
#allow-hotplug wlan0
#iface wlan0 inet manual
# wpa-conf /etc/wpa_supplicant/wpa_supplicant.conf#allow-hotplug wlan1
#iface wlan1 inet manual
# wpa-conf /etc/wpa_supplicant/wpa_supplicant.conf
Save the file and restart your Raspberry Pi. After restart, if you click on the network icon, all wired and wireless networks will appear. Configure your network settings if needed.
The last panel icon to configure is Bluetooth. I prefer to use Blueman. To install Blueman, open Terminal and type in:
- CODE: SELECT ALL
sudo apt-get install blueman
and press Enter. Restart your Raspberry Pi and now the Bluetooth icon should appear in the system tray.
So let’s see what we have so far.
We’re almost there. Let’s add the finishing touches. A new installation of LXDE does come with a notification system, but it is somewhat limited. We will need to uninstall it. Go to Terminal and type in:
- CODE: SELECT ALL
sudo apt-get purge notification-daemon
and press Enter. After it uninstalls, reboot your Raspberry Pi.
We will be using XFCE’s version of notifications instead. You can easily install it by opening Terminal and typing in:
- CODE: SELECT ALL
sudo apt-get install xfce4-notifyd libnotify-bin
and then press Enter. You can customize the theme of the notifications by opening up the notification preferences using Terminal (this is due to the fact that we are not running XFCE, which by default hides the notification settings icon if its being used by other desktop environments) by typing:
- CODE: SELECT ALL
sudo xfce4-notifyd-config
and pressing Enter. The Default notification theme is fine for the Arc theme.
Finally, add a nice wallpaper and you’re done!
Before
After
Virtual Machine Playground
Installing a GUI on Raspbian Lite can either be easy or hard. If you want a particular desktop environment, you just follow the steps to install that environment. For the majority of Raspberry Pi users, that’s more than enough.
But what if we wanted to get our hands dirty? In other words, what if we want the desktop environment to be focused solely on a particular application. For example, the desktop environment should just be focused on a web browser, or it should just be focused on a music player. Is it really necessary for a file manager to be in an operating system that its primary focus is to display web pages? Is it really necessary for an operating system to be running blown desktop environment just to play music? This is where you explore ideas for what kind of GUI Raspian Lite should have.
Can you explore GUI ideas directly on Raspbian Lite? Yes, but the idea of a virtual desktop is for you to explore those GUI ideas in the comfort of your own computer. It is basically a playground. You don’t need to worry about reformatting SD / microSD cards, and you can go back in time using a feature called “snapshots” included in most virtual machine virtualizers in case if you made a mistake or you broke your installation. There is no risk. Not only that, but you also learn more about the inner workings of Linux.
Once you build your desktop environment to your liking in the virtual machine, you simply follow the steps you did on the virtual machine and apply them to your Raspbian Lite installation. If you are interested in reading more on this topic, simply click on the link below to see the full tutorial:
https://www.raspberrypi.org/forums/viewtopic.php?p=1109518#p1109518
Advanced – Custom Desktop Environment using i3 WM
Let’s get serious now. The real reason to use Raspbian Lite is to make the Raspberry Pi microcomputer work for a specific application purpose. The operating system should be customized to that specific application. What kind of applications?
Anything really. Some people use the Raspberry Pi just for:
Clock and Weather
Internet Radio
Web Browser
Music Player
Surveillance
Retro Game Console
and the list goes on and on. What will you be building? To understand the idea of a custom desktop environment, I will go over some examples and maybe it can give you an idea of how to approach and implement your idea. If you are interested in reading more on this topic, simply click on the link below to see the full tutorial:
https://www.raspberrypi.org/forums/viewtopic.php?p=1109520#p1109520
Extras
![]() Something worth to note. You can install any missing package at any time. For example, suppose that we chose to install the MATE desktop environment. Initially, you would only install the core components. That’s fine, but let’s say you wanted popup notifications. If we instead installed the full MATE desktop environment, we would get it, but at the same time, you would also get unnecessary applications and packages.
Something worth to note. You can install any missing package at any time. For example, suppose that we chose to install the MATE desktop environment. Initially, you would only install the core components. That’s fine, but let’s say you wanted popup notifications. If we instead installed the full MATE desktop environment, we would get it, but at the same time, you would also get unnecessary applications and packages.
Try this. The install command to install the full MATE desktop environment is:
- CODE: SELECT ALL
sudo apt-get install mate-desktop-environment
If you enter this code in Terminal and press Enter, you would get a ton of packages required to make it work. But use this to your advantage. By doing some research, it turns out that the MATE desktop environment uses the “mate-notification-daemon” package to display notifications. However, we also need “libnotify-bin” since is the package that sends notifications to the daemon. This package is seen in the Terminal where you entered the install command for the full MATE desktop environment.
So after you installed the core version of the MATE desktop environment, all you have to do to get notifications working is to install “mate-notification-daemon”. The install command for that is simply:
- CODE: SELECT ALL
sudo apt-get install mate-notification-daemon libnotify-bin
Once that installs, you will have notifications working on the core MATE desktop environment! That’s the beauty of personalization and customization. You take something that you need, install it, and configure it. No need to bloat your operating system. No need to have unnecessary things running in the background. And besides, it’s pretty cool personalizing your Pi!
1. Raspberry Pi Configuration Tool
If you have used the regular Rasbian distribution, you probably noticed that there was a tool for configuring the Raspberry Pi. No problem, you can bring it back in Raspbian Lite.
In Terminal, type in:
- CODE: SELECT ALL
sudo apt-get install rc-gui
and press Enter. Install the necessary packages. You may have to reboot your Raspberry Pi to see the configuration tool in your Applications menu or Preferences menu.
2. Build Essentials
Sometimes you need to compile source code files, but you may run into issues like “make” or “gcc” or that headers are missing.
To fix this, in Terminal, type in:
- CODE: SELECT ALL
sudo apt-get install build-essential
and press Enter. Install the necessary packages. You should now be able to compile source code files.
—————————————————————–
Hope you found this guide useful! If there are any questions, comments, suggestions, or concerns, you are free to say down below. ![]()
转载请注明:徐自远的乱七八糟小站 » Raspbian Lite with PIXEL/LXDE/XFCE/MATE/Openbox GUI